Imagine plucking vibrant, fragrant herbs from your own kitchen windowsill, ready to elevate any dish. No more last-minute dashes to the grocery store, no more wilting leftovers – just pure, unadulterated freshness at your fingertips. Growing an indoor herb garden is not just a trend; it’s a delightful, rewarding, and surprisingly easy way to bring nature’s bounty and incredible flavor into your home. Whether you live in a cozy apartment or a sprawling house, the joy of fresh herbs can be yours.
This comprehensive guide is designed for the absolute beginner, eager to transform a bare windowsill into a flourishing edible oasis. We’ll walk you through everything from selecting the perfect herbs to ensuring they thrive, harvest after harvest. Get ready to embark on a green adventure that promises delicious dividends!
Choosing Your Culinary Companions: Best Herbs for Beginners
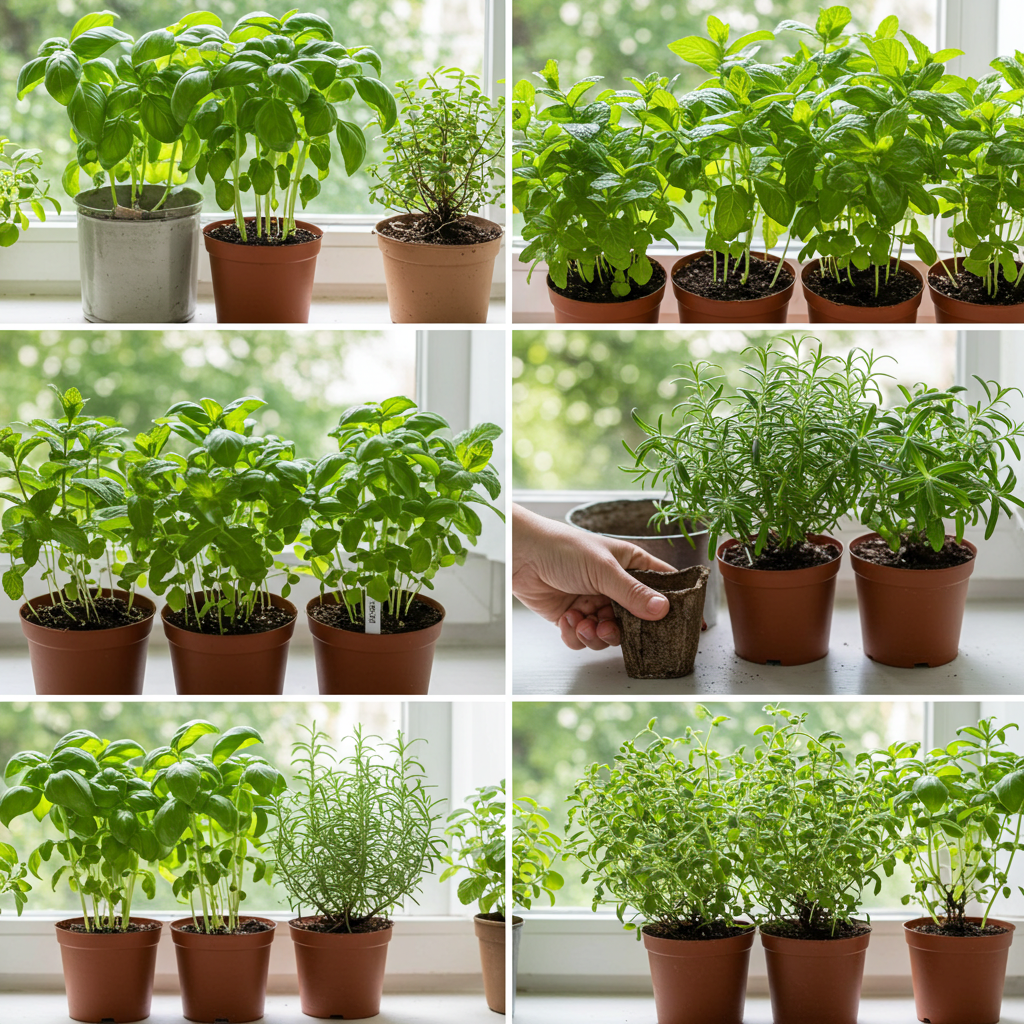
When starting your indoor herb garden, selecting the right plants is crucial for success. Some herbs are simply more forgiving and well-suited to indoor conditions than others. Here are some top picks for new gardeners:
- Basil (_Ocimum basilicum_): A kitchen staple, basil loves warmth and sunlight. It’s relatively easy to grow from seed or starter plants and rewards you with aromatic leaves perfect for Italian cuisine.
- Mint (_Mentha spp._): Known for its vigorous growth, mint is almost too easy! Keep it in its own pot, as it can be invasive. Varieties like spearmint and peppermint are fantastic for teas, cocktails, and desserts.
- Chives (_Allium schoenoprasum_): These oniony greens are robust and can tolerate lower light conditions than many other herbs. They’re great for garnishing and adding a mild onion flavor.
- Parsley (_Petroselinum crispum_): Both flat-leaf (Italian) and curly parsley thrive indoors with enough light. It’s a versatile herb, used as a garnish or a foundational flavor in many dishes.
- Rosemary (_Salvia rosmarinus_): This woody herb prefers plenty of light and good air circulation. It’s a bit slower growing but incredibly rewarding for its distinct, piney aroma, ideal for roasted meats and potatoes.
- Thyme (_Thymus vulgaris_): Another woody herb, thyme is relatively drought-tolerant and needs ample light. Its tiny leaves pack a powerful punch in soups, stews, and roasted vegetables.
- Oregano (_Origanum vulgare_): Similar to thyme, oregano is hardy and prefers sunny, well-drained conditions. It’s a must-have for Mediterranean and Mexican dishes.
Pro Tip: Consider what you actually cook with! If you rarely use rosemary, perhaps prioritize basil or mint. Start with 2-3 herbs to gain confidence before expanding your collection.
Gathering Your Arsenal: Essential Supplies for Success
Before you get your hands dirty, you’ll need a few basic supplies. Don’t worry, you don’t need to break the bank; many items can be found at your local garden center or even around your home.
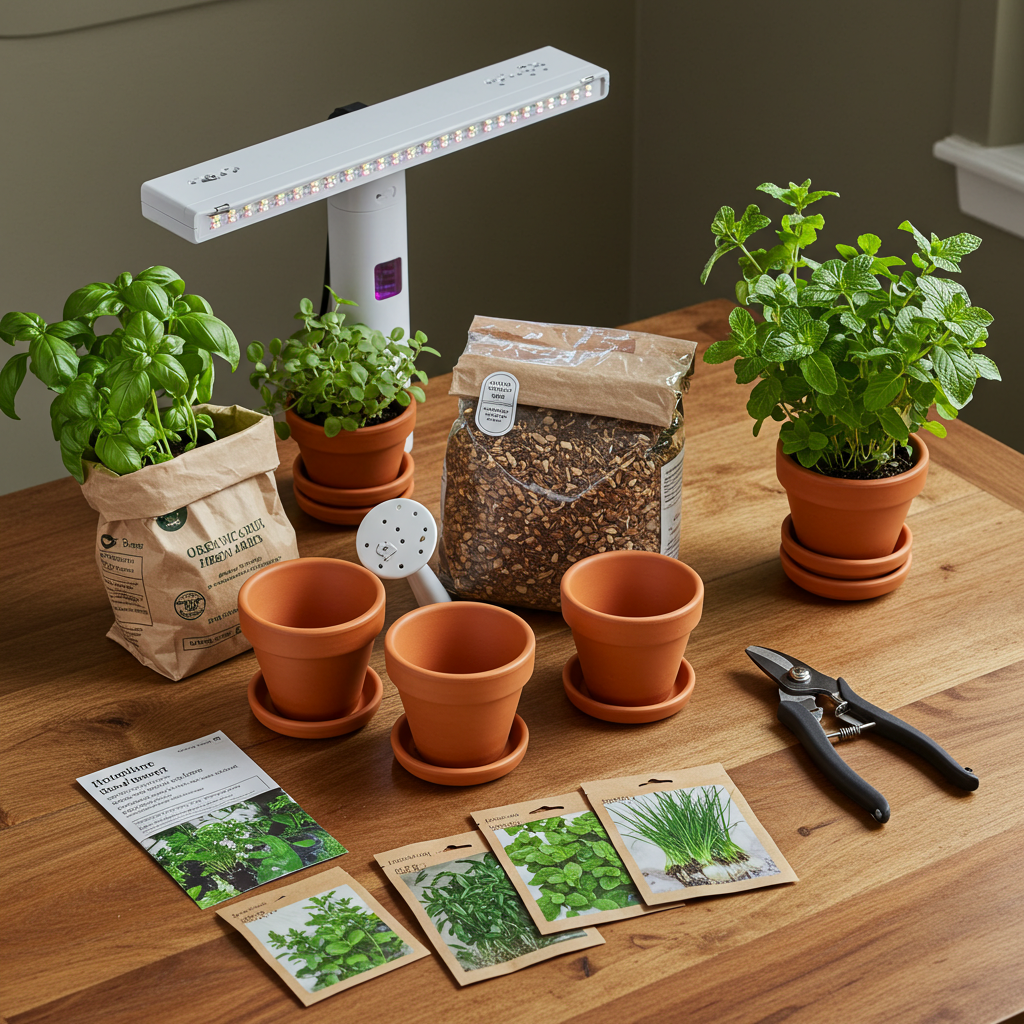
1. Containers with Drainage
This is non-negotiable! Proper drainage is paramount to prevent root rot, the silent killer of many indoor plants. Look for pots with drainage holes at the bottom and accompanying saucers to catch excess water. Materials like terracotta (breathable, but dries out faster), plastic (retains moisture, lightweight), or ceramic are all suitable. Aim for pots at least 6-8 inches in diameter for most herbs to allow for root growth.
2. High-Quality Potting Mix
Do *not* use garden soil. It’s too heavy for containers and can contain pests or diseases. A good quality potting mix designed for containers will be light, airy, and provide excellent drainage while retaining some moisture. Look for mixes that contain perlite, vermiculite, or coco coir for improved aeration.
3. Light Source
This is often the biggest challenge for indoor gardeners. Most herbs require at least 4-6 hours of direct sunlight daily to thrive. A south-facing window is ideal. If natural light is insufficient, consider investing in a grow light. LED grow lights are energy-efficient and come in various sizes and spectrums. A simple full-spectrum LED light can make a huge difference in your herbs’ growth and vigor.
4. Watering Can & Sprayer
A small watering can with a narrow spout allows for precise watering without disturbing the soil. A spray bottle can be useful for misting certain humidity-loving herbs or rinsing leaves.
5. Pruning Shears or Scissors
Clean, sharp scissors or small pruning shears are essential for harvesting your herbs without damaging the plant. Regular pruning encourages bushier growth and prolongs the life of your herb plants.
6. Plant Labels
Especially if you’re planting from seed or have multiple varieties, plant labels are a simple way to keep track of what’s what.
Setting Up Your Indoor Herb Oasis
With your supplies gathered, it’s time to bring your vision to life!
Location, Location, Location
Find the sunniest spot in your home. As mentioned, a south-facing window is best. East or west-facing windows can work, but north-facing windows generally won’t provide enough light for most herbs. If natural light is lacking, position your grow light about 6-12 inches above your plants, adjusting as they grow.
Planting Your Herbs: Seeds vs. Starter Plants
- From Seeds: More economical and offers a wider variety. Fill your pots with potting mix, leaving about an inch of space from the rim. Follow the seed packet instructions for planting depth and spacing. Gently water. Germination can take days to weeks, requiring patience.
- From Starter Plants: Faster results and less initial fuss. Gently remove the plant from its nursery pot, loosen any circling roots, and place it in your new container. Fill around the root ball with fresh potting mix, gently firming it down. Water thoroughly.
No matter which method you choose, ensure your plants have enough room. Don’t overcrowd pots, as this restricts air circulation and competes for nutrients. For most herbs, one plant per 6-8 inch pot is a good rule of thumb, though smaller herbs like thyme or oregano might tolerate two.
The Art of Nurturing: Care and Maintenance
Consistent care is the secret to a thriving indoor herb garden. Here’s what your herbs need to flourish:
Watering: The Golden Rule
Overwatering is the most common killer of indoor plants. Instead of watering on a strict schedule, feel the soil. Stick your finger about an inch or two into the potting mix. If it feels dry, it’s time to water. If it’s still damp, wait. Water thoroughly until water drains from the bottom of the pot. Empty the saucer after about 15-30 minutes to prevent roots from sitting in standing water. Adjust frequency based on ambient temperature, humidity, and the type of herb (e.g., mint loves water, rosemary prefers to dry out a bit).
Light: More is Usually Better
As discussed, 4-6 hours of direct light is ideal. If using a grow light, aim for 12-16 hours per day. Rotate your pots regularly (every few days) to ensure all sides of the plant receive adequate light, promoting even growth.
Temperature & Humidity
Most herbs prefer temperatures between 65-75°F (18-24°C), similar to comfortable indoor temperatures. Avoid placing them directly near cold drafts or hot air vents. While many herbs don’t require high humidity, a light misting now and then can be beneficial, especially in dry winter months. Alternatively, placing pots on a tray of pebbles filled with water (ensuring the pot doesn’t sit directly in the water) can increase local humidity.
Fertilizing: A Little Boost
Potting mix contains some nutrients, but your herbs will eventually deplete them. After about 4-6 weeks, start feeding your herbs with a balanced liquid fertilizer, diluted to half or quarter strength, every 2-4 weeks during their active growing season (spring and summer). Reduce or stop fertilizing in winter when growth slows.
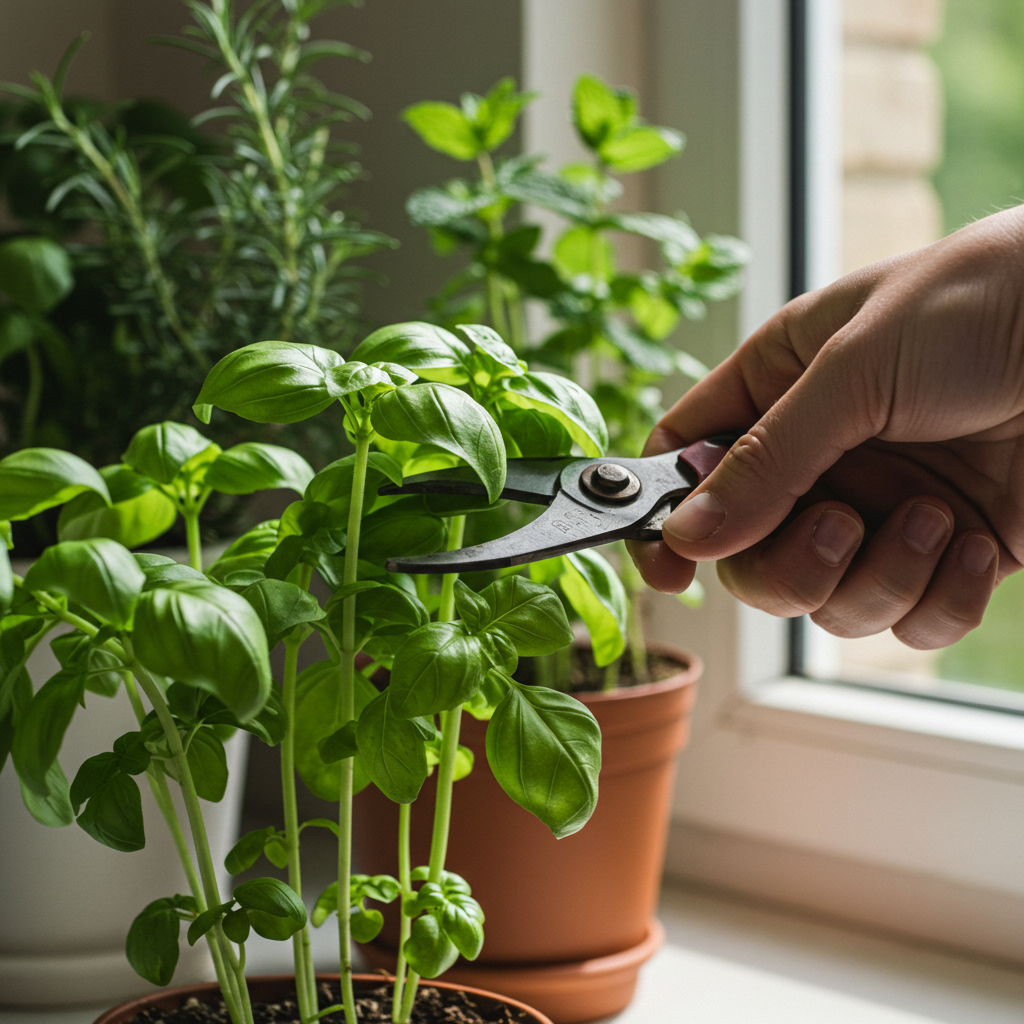
Pruning & Harvesting: The Key to Bushy Growth
This is perhaps the most exciting part! Regular harvesting not only provides you with fresh herbs but also encourages your plant to grow bushier and more productive. Don’t be shy!
- For leafy herbs (basil, mint, parsley): Pinch off the top sets of leaves, just above a leaf node (where leaves branch off). This promotes branching and prevents the plant from becoming leggy.
- For woody herbs (rosemary, thyme, oregano): Snip off the newer, softer growth. Avoid cutting into the old, woody stems too much, as these may not regrow.
Harvest small amounts regularly rather than stripping the plant bare. Never remove more than one-third of the plant at a time. The more you harvest, the more it will produce!
Pest Patrol: Vigilance is Key
Indoor plants can sometimes attract pests like aphids, spider mites, or fungus gnats. Inspect your plants regularly (especially the undersides of leaves) for any signs of trouble. If you spot pests:
- Isolate: Move the affected plant away from others.
- Wipe: Use a damp cloth to gently wipe away visible pests.
- Spray: A gentle solution of insecticidal soap or neem oil (follow product instructions) can be effective. Repeat as necessary.
Troubleshooting Common Indoor Herb Problems
Even with the best intentions, you might encounter a few hurdles. Here’s how to diagnose and fix common issues:
- Leggy, Stretched Growth: This is almost always a sign of insufficient light. Move your plant to a brighter location or add a grow light. Regular pruning can also help encourage bushier growth.
- Yellowing Leaves: Can be caused by overwatering (most common), underwatering, or nutrient deficiency. Check the soil moisture first. If it’s too wet, let it dry out more between waterings. If too dry, water thoroughly. If neither, consider a diluted feeding.
- Wilting: Similar to yellowing, wilting can be from overwatering (roots are suffocating) or severe underwatering (plant is thirsty). Again, check soil moisture first.
- Brown, Crispy Leaf Edges: Often a sign of low humidity or underwatering. Increase humidity around the plant or ensure consistent watering.
Remember, your herbs are living things and will communicate their needs if you pay attention. A little observation goes a long way!
Beyond the Basics: Expanding Your Green Thumb
Once you’ve mastered the basics, you might find yourself addicted to the joy of indoor gardening! Here are some ideas to continue your journey:
- Experiment with New Herbs: Try more exotic varieties like lemongrass, tarragon, or even small chili peppers.
- Hydroponics & Aeroponics: For a more high-tech approach, explore soilless growing systems that can lead to rapid growth.
- DIY Vertical Gardens: Maximize your space with wall-mounted planters or tiered shelves.
- Companionship: Learn about companion planting to see if certain herbs benefit from growing near others.
Conclusion: Your Fresh Herb Journey Begins Now!
Growing an indoor herb garden is a simple pleasure that yields bountiful rewards. From the satisfaction of nurturing a living plant to the unparalleled taste of freshly picked herbs in your cooking, it’s an experience that enriches both your home and your palate. With a little light, water, and consistent care, you’ll be enjoying your own harvest in no time.
Don’t delay – pick out a few of your favorite herbs, gather your supplies, and start your indoor herb garden today. Your taste buds (and your wallet!) will thank you. Happy gardening!