There’s nothing quite like the feeling of a freshly painted room – it’s a simple yet powerful way to transform your living space and express your personal style. Whether you’re a seasoned DIY enthusiast or embarking on your very first home improvement project, having the best wall painting tools at your disposal is the secret to achieving a professional-looking finish. In fact, the enthusiasm for personalizing homes is soaring, with the percentage of paint customers applying their own interior paint increasing to a remarkable 70% in 2023, up from 65% in 2022. Interior painting was also one of the most popular home improvement projects in 2023, undertaken by 30% of homeowners. This guide is designed to walk you through the essential equipment, tips, and techniques needed to tackle your next wall painting project with confidence, ensuring a perfect result every time.
What Are the Essential Tools for Painting Walls?
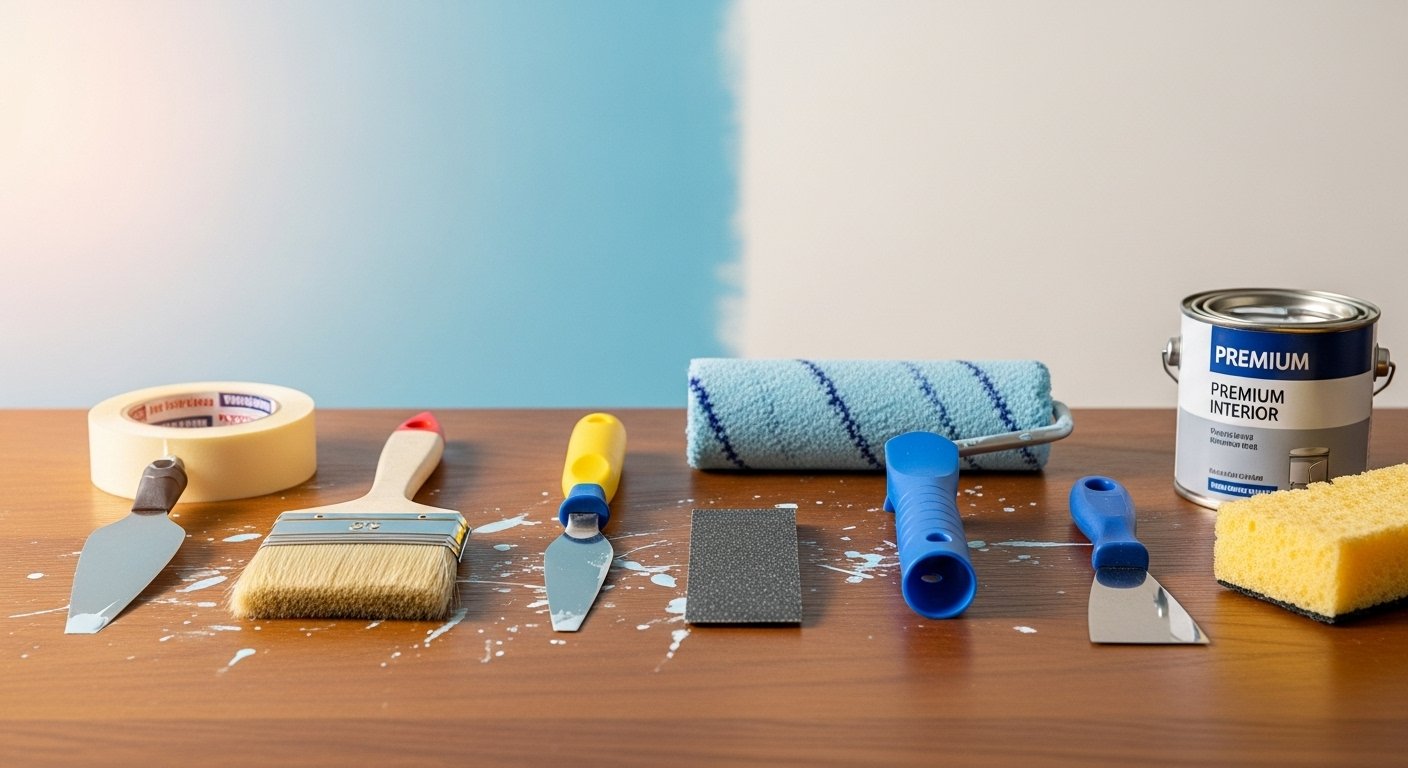
To achieve a smooth and vibrant finish on your walls, here’s a quick rundown of the must-have painting equipment you’ll need:
- Wall Cleaner & Sponges: For a pristine surface.
- Spackle & Putty Knives: To fill any imperfections.
- Sanding Sponges/Sandpaper: For smoothing patched areas.
- Painter’s Tape: To protect trim and create crisp lines.
- Drop Cloths/Tarps: To safeguard floors and furniture.
- Paint Rollers & Roller Covers: For efficient paint application on large areas.
- Paint Trays & Buckets: For holding and loading paint.
- Angled Paint Brushes: For precision work and ‘cutting in’.
- Extension Poles: For reaching high walls and ceilings safely.
- Ladder/Stepladder: For elevated access.
- Paint Stirrers & Can Opener: Small but crucial for paint preparation.
Why the Right Tools Make All the Difference
Think of painting as an art form; just like a sculptor needs the right chisels, a painter needs the right tools. Investing in quality items might seem like an extra step, but it saves time, reduces frustration, and significantly improves the outcome. Poor quality tools can lead to streaks, uneven coats, messy lines, and a project that takes far longer than it should. The global painting tools market itself is a testament to this importance, valued at USD 10.8 billion in 2023 and projected to grow at a Compound Annual Growth Rate (CAGR) of 4.4% between 2024 and 2032, highlighting the increasing demand for effective solutions for both professional and DIY painters. Opting for the right equipment ensures your hard work results in a flawless, long-lasting finish that you’ll be proud to show off.
Essential Wall Preparation Tools for Painting Perfection
Before you even think about applying a single stroke of paint, proper wall preparation is paramount. This crucial step sets the foundation for a smooth, durable, and beautiful finish. Skipping this stage often leads to disappointing results, such as uneven surfaces or paint that peels prematurely. Many ask, “How do you prepare walls for painting?” Let’s break down the essential tools for getting your walls ready.
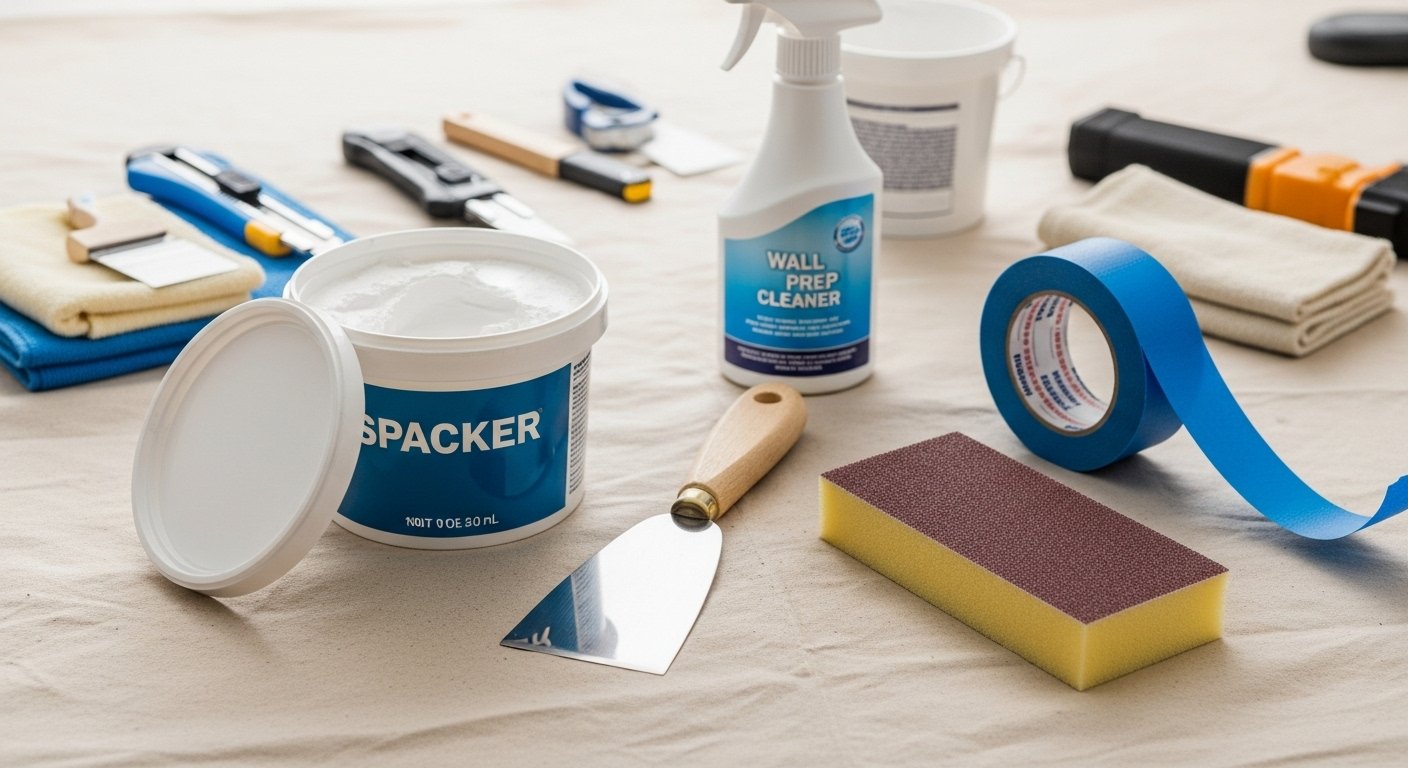
Wall Cleaner and Sponges
Over time, walls accumulate dirt, grime, and grease that can prevent paint from adhering properly. A good wall cleaner, often a sugar soap solution, along with sturdy sponges, will remove these contaminants, providing a clean canvas for your paint. [15] Cleaning also helps in identifying any hidden imperfections that need attention.
Spackle and Putty Knives
Small holes from nails, minor cracks, or dents are common. Spackle and Putty Knives are your best friends here. A flexible putty knife helps you apply spackle smoothly to fill these imperfections. For larger holes, you might need lightweight spackling compound and a wider spackling blade for even application. Once dry, spackle provides a seamless repair, making the wall look brand new.
Sanding Sponges and Sandpaper
After filling holes with spackle, or if your walls have any rough patches or old paint drips, sanding is necessary. Fine to medium-grit sanding sponges or sandpaper will smooth out patched areas and lightly abrade glossy surfaces, helping new paint adhere better. [11], [14] Remember to wipe away any dust with a tack cloth after sanding to maintain a clean surface.
Caulk Gun and Caulk
Caulk is invaluable for sealing small gaps between walls and trim, baseboards, or window frames. A caulk gun allows for precise application, creating a neat, sealed edge that prevents paint from seeping into unwanted crevices and gives a finished, professional look. This also helps in achieving crisp lines later with painter’s tape.
The Best Wall Painting Tools for Application
Once your walls are prepped and primed, it’s time for the exciting part: applying the paint! This section covers the best wall painting tools for laying down that beautiful new color efficiently and effectively, including many professional wall painting tools that even DIYers can master.
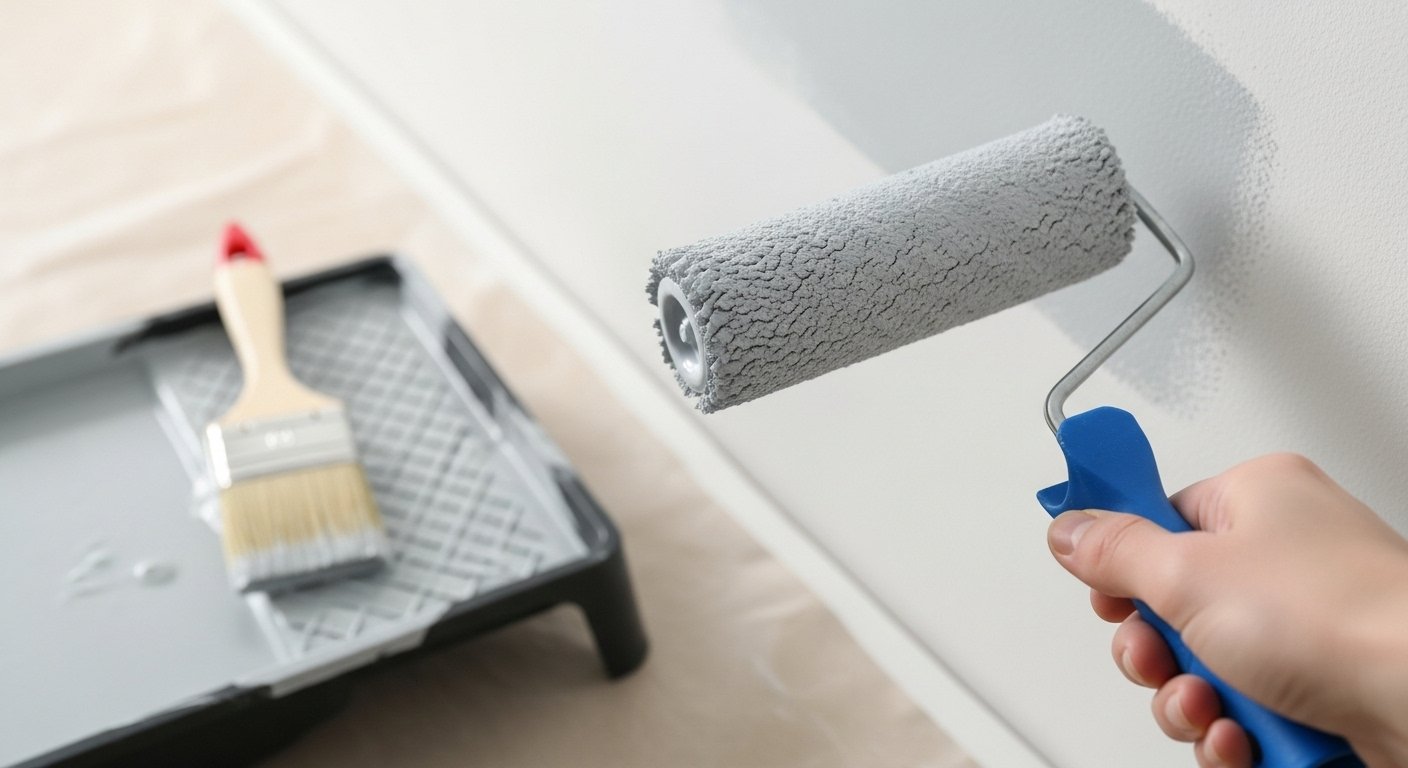
Paint Rollers: Your Go-To for Large Surfaces
Paint Rollers are indispensable for covering large wall and ceiling areas quickly and evenly. They come in various sizes and nap (pile) lengths, designed for different types of surfaces and paints. The global paint rollers market size was evaluated at $3.02 billion in 2023 and is slated to hit $5.06 billion by the end of 2032 with a CAGR of nearly 5.90% between 2024 and 2032, underscoring their widespread use and importance. [4]
- Smooth Surfaces (e.g., drywall, plaster): For a truly smooth finish, opt for a roller cover with a short nap (1/4 inch to 3/8 inch). Foam rollers can also produce a very flat and even finish with minimal roller marks, especially with water-based paints. [5]
- Lightly Textured Surfaces: A medium nap (3/8 inch to 1/2 inch) is versatile for most walls.
- Heavily Textured Surfaces (e.g., stucco): A longer nap (3/4 inch to 1 inch or more) is needed to get paint into all the crevices. For more detailed information on different types of paint rollers and their uses, you can consult resources like Wikipedia’s entry on Paint Rollers. [4]
Paint Trays and Buckets
These seemingly simple items are critical for efficient paint application. A sturdy Paint Tray with a ribbed ramp allows you to evenly load your roller and remove excess paint, preventing drips and splatters. For larger projects or when using a paint sprayer, a 5-gallon bucket with a paint grid can be more efficient, allowing you to load more paint at once and easily dip your roller. Some professional painters even use a Handy Paint Pail for smaller jobs and cutting in, which is easy to hold and minimizes mess.
Angled Paint Brushes: For Precision and Cutting In
While rollers handle the bulk of the work, Angled Paint Brushes are essential for precision. They are perfect for “cutting in” – painting neat lines along edges, corners, trim, and around windows and doors. An angled sash brush, typically 2 to 3 inches wide, offers excellent control for these detailed areas. Different bristle types are available: synthetic bristles are great for latex (water-based) paints, while natural bristles are preferred for oil-based paints.
Paint Sprayer for Interior Walls
For those looking to cover large areas very quickly and achieve an ultra-smooth, factory-like finish, a Paint Sprayer for Interior Walls can be a game-changer. While they require more setup and cleanup than traditional rollers and brushes, they can significantly reduce painting time and are considered one of the must-have painting equipment for a perfectly smooth result. However, proper masking and ventilation are crucial when using a sprayer. You’ll want to ensure you’re practicing healthy indoor painting practices, which often involves significant ventilation. [8]
Essential Accessories for a Professional Finish
Beyond the primary application tools, a collection of crucial accessories ensures your painting project is clean, efficient, and yields a truly professional finish. These elements are often overlooked by beginners but are integral to both DIY wall painting tools and professional painting tools alike.
Painter’s Tape for Crisp Lines
Painter’s Tape is non-negotiable for achieving sharp, clean edges between different colored surfaces or to protect trim, baseboards, window frames, and ceilings. There are various types, including delicate surface tape for freshly painted walls and multi-surface tape for general use. Applying it properly – pressing firmly to ensure a seal – and removing it at the right time (usually when the paint is dry to the touch but not fully cured) is key to preventing paint bleed and securing those crisp lines. [11]
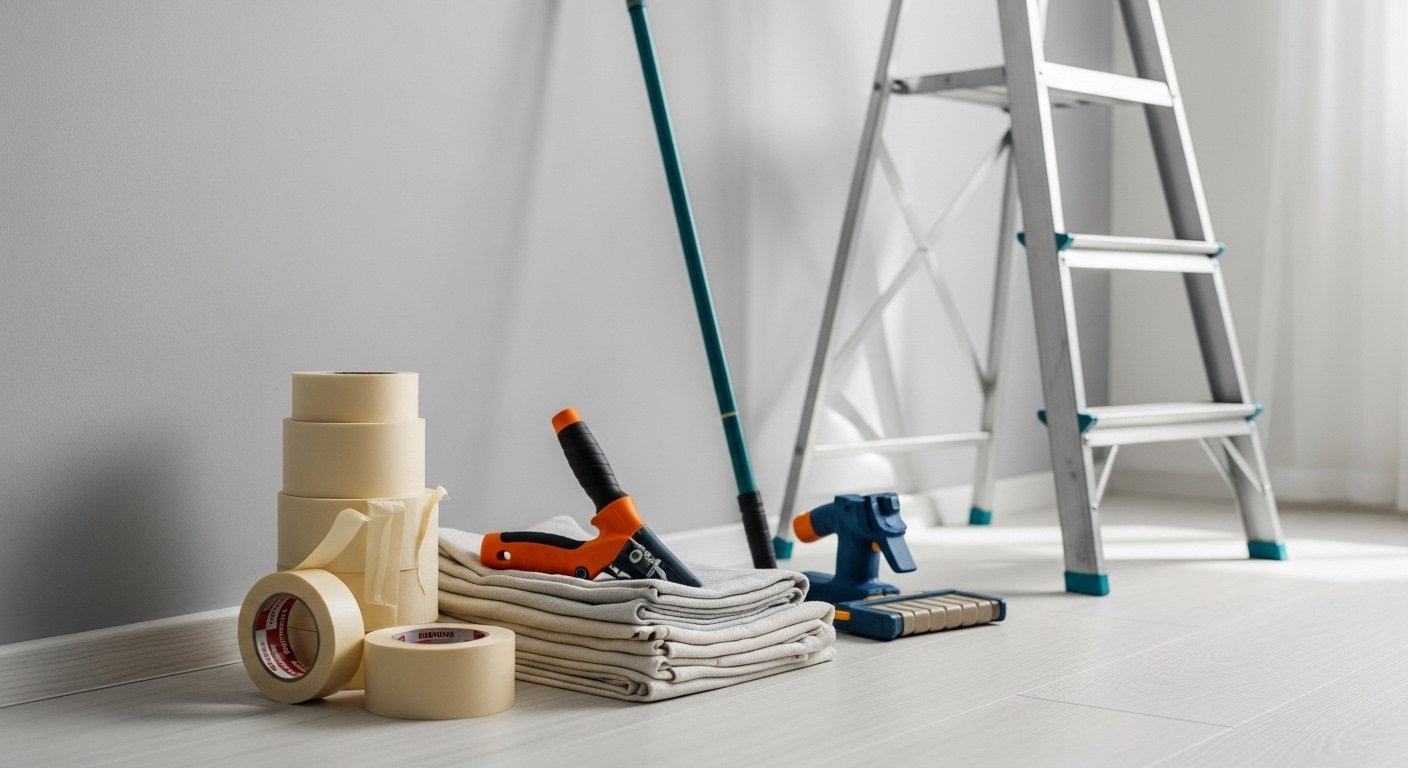
Drop Cloths and Tarps for Protection
Paint drips and splatters are almost inevitable, no matter how careful you are. Drop Cloths (canvas or plastic) and tarps are essential for protecting your floors, furniture, and any items you can’t remove from the room. Canvas drop cloths are durable, absorbent, and less slippery than plastic, making them a favorite among professionals. Plastic sheeting is often used to cover furniture, providing a lightweight, dust-proof barrier. [13]
Extension Poles for High Walls and Ceilings
Say goodbye to precarious ladder climbs for ceiling and upper wall sections! An Extension Pole for Painting High Walls significantly extends the reach of your paint roller, allowing you to paint comfortably and safely from the floor. They come in various adjustable lengths, making them versatile for different room heights and ensuring an even coat across expansive surfaces without lap marks.
Ladders and Stepladders
Even with an extension pole, a sturdy ladder or stepladder is a must-have for cutting in at high points, accessing corners, or reaching areas inaccessible by a roller. Prioritize stability and choose a ladder height appropriate for your ceiling height to work safely and effectively.
Paint Can Opener and Stirrers
These might seem minor, but they are crucial! A dedicated paint can opener makes getting into those sealed cans much easier without damaging the lid. Paint stirrers (wooden or metal) are vital for thoroughly mixing your paint before and during application, ensuring consistent color and proper paint consistency. [15] Don’t stir surface film into the paint; remove it first. [10]
How to Choose the Best Wall Painting Tools
Selecting the right tools is a blend of understanding your project, your skill level, and your budget. With the global market for low- and zero-VOC paints projected to reach $11.17 billion by 2025 and climb to $17.83 billion by 2032, reflecting a growing demand for eco-friendly painting options, your tool choices can also align with sustainable practices by opting for durable, reusable tools.
- Project Size: For a small accent wall, a few brushes, a mini roller, and painter’s tape might suffice. For an entire house, a comprehensive painting supplies checklist, including multiple rollers, an extension pole, and ample drop cloths, is advisable.
- Surface Type: As discussed, the texture of your walls dictates the type of roller nap. Smooth walls demand finer naps for a sleek finish.
- Paint Type: Latex paints clean up easily with water, making synthetic brushes and rollers ideal. Oil-based paints require natural bristles and mineral spirits for cleanup.
- Your Experience Level: Beginners might prefer basic, easy-to-handle DIY wall painting tools. More experienced painters might venture into paint sprayers for efficiency.
- Quality over Cost: While it’s tempting to buy cheap tools, they often lead to frustration and a subpar finish. Investing a little more in good quality brushes, rollers, and tape will pay off in the long run. If you’re building your toolkit from scratch, consider starting with an essential home decor tools DIY project kit, which often includes foundational items. For those looking to set up their initial array of implements, check out a first home decor tool kit for guidance on getting started.
Tips for Achieving a Perfect Paint Finish on a Wall
Achieving that coveted smooth, flawless finish isn’t just about the tools; it’s also about technique and attention to detail. Many wonder, “How do you get a perfect paint finish on a wall?” Here are some pro tips:
1. Preparation is Key: Reiterate the importance of clean, smooth, and primed walls. Don’t rush this step. [11]
2. Proper Ventilation: Always ensure the room is well-ventilated during and after painting to dissipate fumes and ensure proper drying. Open windows and use fans to create cross-ventilation. For comprehensive guidelines on healthy indoor painting practices, refer to resources from the U.S. Consumer Product Safety Commission (CPSC). [7], [8]
3. Cutting In First: Use your angled brush to paint a strip along all edges, corners, and trim before rolling the main wall sections. This allows for precision.
4. Work in Sections, Maintain a Wet Edge: When using a roller, work in manageable sections (e.g., 2×2 or 3×3 feet). Apply paint in a ‘W’ or ‘M’ pattern, then fill it in with even vertical strokes without lifting the roller. [13], [15] The goal is to always roll into a wet edge of paint, preventing unsightly lap marks.
5. Two Thin Coats are Better Than One Thick Coat: Thin coats dry more evenly and reduce drips and brush marks. Allow adequate drying time between coats as per the paint manufacturer’s instructions. [12]
6. Don’t Overload Tools: Excess paint on brushes or rollers leads to drips and uneven application. Dip about a third of your brush bristles into paint and roll off excess from your roller.
7. Remove Tape Carefully: Remove painter’s tape when the paint is dry to the touch but not fully cured, usually within a few hours. Pull it off slowly at a 45-degree angle to reveal a sharp line. [12]
Your Comprehensive Painting Supplies Checklist
To help you organize your project, here’s a thorough list of what equipment do I need to paint a wall, covering everything from wall preparation tools for painting to essential finishing touches. This list includes both essential painting tools for beginners and items that professional painters use for a smooth finish.
Wall Preparation
* Wall Cleaner (e.g., sugar soap)
* Large Sponges
* Spackle or Patching Compound
* Putty Knife (1.5-inch to 3-inch)
* Sanding Sponges or Sandpaper (fine to medium grit)
* Caulk Gun and Paintable Caulk
* Screwdriver (for removing switch plates, outlet covers)
Paint Application
* Interior Wall Paint
* Paint Primer (if necessary)
* Paint Rollers (frame and various nap covers)
* Short nap (1/4″ – 3/8″) for smooth walls
* Medium nap (3/8″ – 1/2″) for general use
* Paint Trays or 5-Gallon Bucket with Grid
* Angled Paint Brushes (2-inch to 3-inch for cutting in)
* Mini Rollers (for tight spaces, behind radiators)
* Paint Sprayer (optional, for speed and smooth finish)
Protection & Safety
* Painter’s Tape (various widths, multi-surface or delicate)
* Drop Cloths (canvas preferred, plastic for furniture)
* Plastic Sheeting (for covering furniture)
* Extension Pole (adjustable)
* Stepladder or Ladder
* Gloves (disposable nitrile or latex)
* Safety Glasses
* Dust Mask or Respirator (especially during sanding or spraying)
* Old Rags/Cloth
Miscellaneous & Cleanup
* Paint Can Opener
* Paint Stirrers
* Bucket for Water (for water-based paint cleanup)
* Brush and Roller Cleaner (for oil-based paints or deep cleaning)
* Empty Cans or Containers (for leftover paint storage)
* Garbage Bags
* Hand Cleaner
Conclusion
Embarking on a home painting project is a rewarding endeavor that can dramatically enhance your living space. By understanding the importance of proper preparation and equipping yourself with the best wall painting tools, you’re well on your way to achieving painting perfection. Remember, the right tools, combined with careful technique and attention to detail, are your allies in transforming your walls with a beautiful, professional-grade finish. So gather your supplies, plan your attack, and get ready to enjoy the stunning results of your hard work!
Key Takeaways
- Proper wall preparation (cleaning, patching, sanding) is crucial for a lasting, smooth paint finish.
- Essential tools include paint rollers (with appropriate nap), angled paint brushes, painter’s tape, and drop cloths.
- Choosing quality tools, even for DIY projects, significantly improves efficiency and results.
- Employing techniques like ‘cutting in’ and maintaining a ‘wet edge’ helps achieve a professional look.
- Safety measures, including ventilation and protective gear, are vital throughout the painting process.
- The global painting tools market is growing, reflecting increased interest in home improvement and DIY painting.
Frequently Asked Questions
What are the basic tools for painting a room?
The basic tools for painting a room include wall cleaner, spackle and putty knives for repairs, painter’s tape for masking, drop cloths for protection, a paint roller with appropriate covers, a paint tray, angled paint brushes for cutting in, and a paint stirrer. An extension pole is also highly recommended for ceilings and high walls.
What kind of roller is best for smooth walls?
For smooth walls, the best paint rollers are those with a short nap, typically 1/4 inch to 3/8 inch. Foam rollers are also an excellent choice for achieving an ultra-smooth finish with water-based paints, as they minimize texture and roller marks.
What tools do professional painters use for a flawless finish?
Professional painters rely on a combination of high-quality essential tools, including premium synthetic brushes for precision, durable shed-resistant roller covers for smooth application, high-adhesion painter’s tape for crisp lines, sturdy extension poles, and sometimes paint sprayers for large areas and factory-like finishes. They also prioritize extensive wall preparation tools like spackle, putty knives, and sanding equipment.
How important is wall preparation for painting?
Wall preparation is critically important for painting perfection. It ensures paint adheres properly, prevents peeling, and eliminates visible imperfections. Cleaning, patching holes and cracks, and sanding rough areas create a smooth, clean surface that allows for a flawless, long-lasting paint finish.
Can a paint sprayer be used for interior walls?
Yes, a paint sprayer can be used for interior walls and is often preferred by professionals for its speed and ability to deliver a very smooth, even finish. However, using a sprayer requires extensive masking of all surfaces not to be painted and ensuring excellent ventilation to manage paint fumes and overspray.