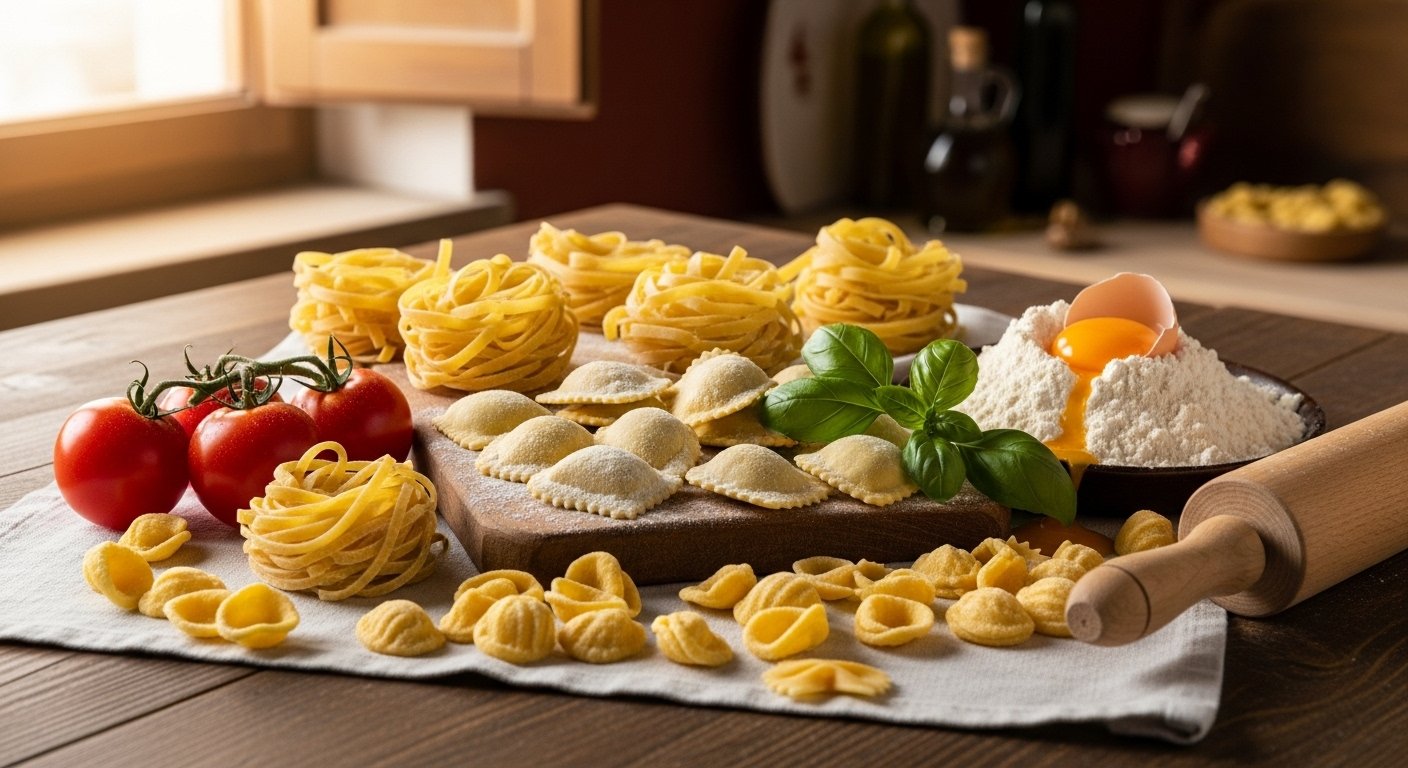
There’s something undeniably magical about a plate of freshly made pasta. The delicate texture, the way it clings to sauce, and the rich, authentic flavor are a world apart from anything store-bought. If you’ve ever dreamt of recreating that magic in your own kitchen, you’re in the right place. Learning how to make Italian pasta at home isn’t just about cooking; it’s about embracing a culinary tradition, connecting with your food, and experiencing the deep satisfaction of creating something truly delicious from scratch. This comprehensive guide will walk you through every step, from selecting the right flour to shaping your favorite pasta types.
In an era where home cooking continues to thrive, mastering skills like pasta making offers immense rewards. Recent data indicates that approximately 70% of consumers plan to continue cooking at home after the pandemic, highlighting a sustained interest in more involved culinary activities. [1, 2] Furthermore, 73% of consumers report feeling accomplished when they cook at home, a sentiment undoubtedly amplified when achieving the art of homemade Italian pasta. [1, 2] There’s a burgeoning appreciation for Italian cuisine and a rising demand for authentic ingredients, making now the perfect time to delve into the world of traditional pasta making. [1, 2]
Why Make Fresh Pasta at Home?
Making fresh pasta offers a myriad of benefits that elevate your culinary experience. Firstly, the taste and texture are simply superior. Fresh pasta boasts a delicate, tender bite that dried pasta can’t replicate, absorbing sauces more effectively. Secondly, it allows for complete control over ingredients, ensuring you use high-quality components free from additives and preservatives. This also opens up opportunities for nutritional benefits, such as higher protein content or increased fiber, depending on your ingredient choices. [1, 2]
The revival of traditional cooking techniques and a rising consumer interest in food provenance and artisanal craftsmanship suggest that handmade pasta is a trend with lasting appeal. [1, 2] It’s an opportunity to engage in a mindful, rewarding activity that transforms simple ingredients into an extraordinary meal. Mastering homemade pasta is a fundamental step in learning how to cook delicious meals from scratch. While simple, having the right essential kitchen gadgets can significantly streamline the process.
The Essential Ingredients for Authentic Italian Pasta
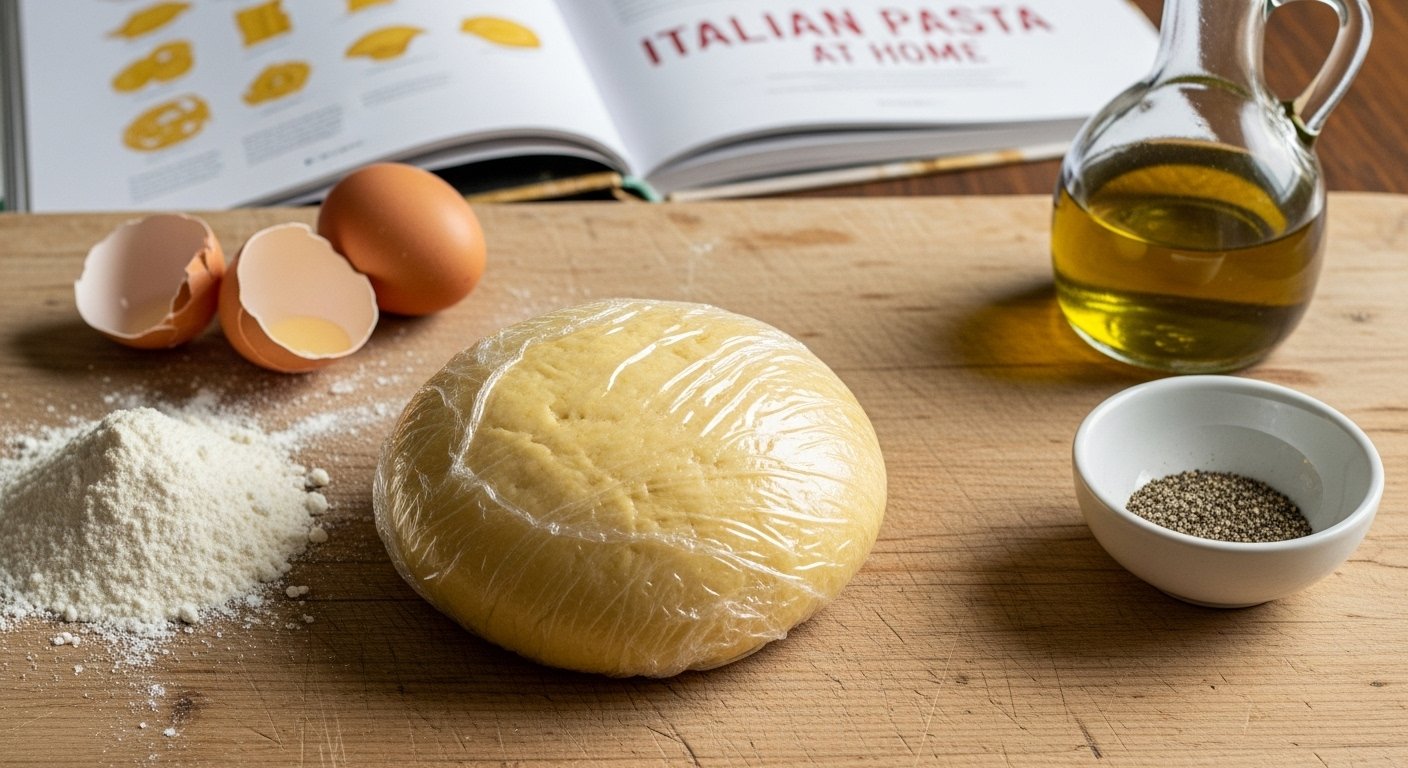
The beauty of Italian pasta lies in its simplicity. You only need a few high-quality ingredients to create a masterpiece. The key is understanding their roles and how they interact.
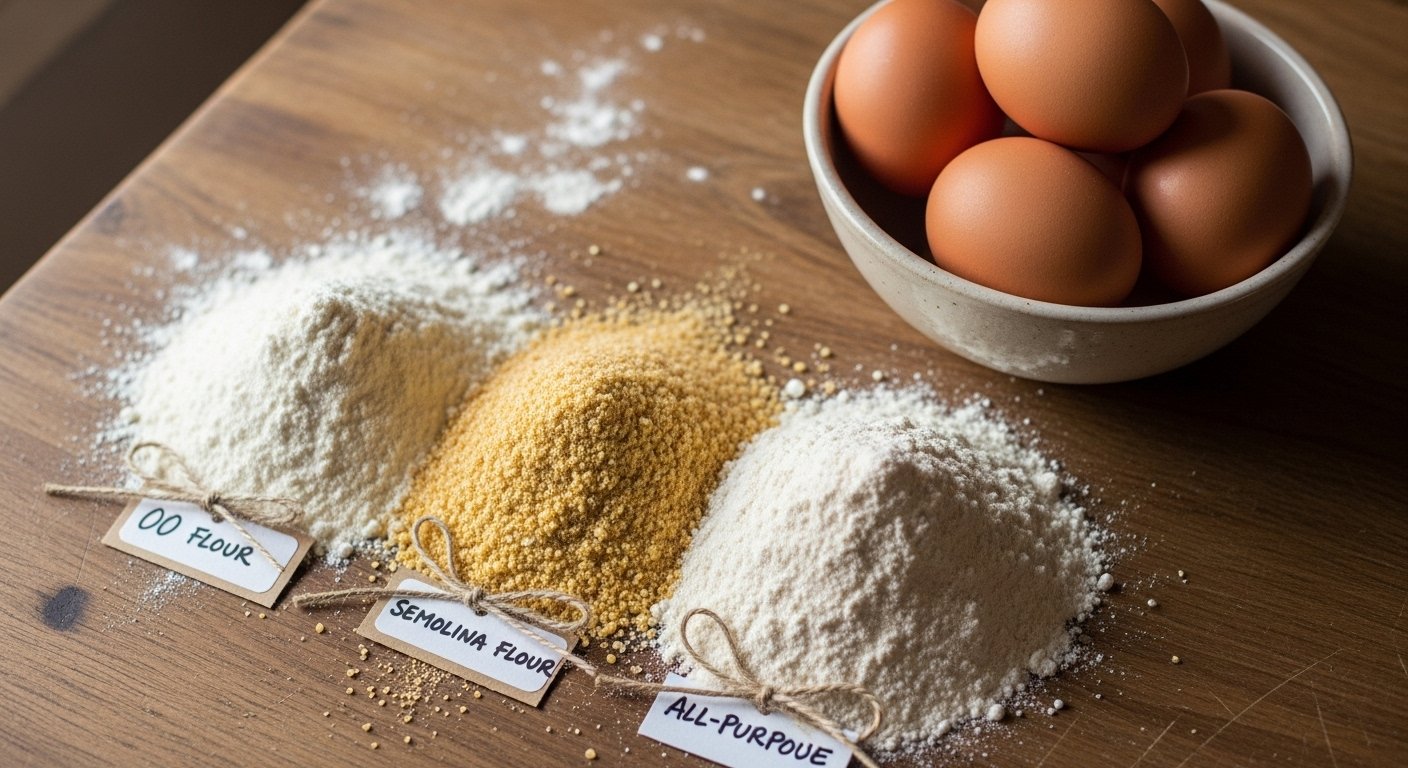
Flour Power: Choosing the Right Type
Choosing the correct flour is paramount for achieving the desired dough consistency and texture. Traditionally, Italian pasta often uses specific flour types:
- ’00’ Flour: This finely milled, low-protein flour is a staple in Northern Italy, particularly for egg-based fresh pasta. It creates an incredibly silky, pliable dough that results in tender pasta. [2]
- Semolina Flour (Durum Wheat Semolina): Made from hard durum wheat, semolina flour is coarser and higher in protein. It’s favored in Southern Italy for eggless pasta, often combined with water, producing a firm, chewy texture ideal for shapes like orecchiette or cavatelli. You can also play around with adding 10-30% hard flours to a soft flour egg yolk dough for varied elasticity and plasticity. [3]
- All-Purpose Flour: While ’00’ flour and semolina are traditional, good quality all-purpose flour can also yield excellent results, especially when you’re starting out. [4, 6] It’s a versatile alternative that many home cooks find accessible.
Eggs: The Heart of Many Pasta Doughs
For most fresh pasta recipes, especially those from Northern Italy, eggs are crucial. Use large, room temperature eggs. Some recipes call for a higher ratio of egg yolks to whole eggs, or even all egg yolks, for a richer, firmer, and more intensely colored dough. [2, 3] The color of the egg yolks can significantly impact the pasta’s final hue, so opt for high-quality, free-range eggs if possible. [2]
The Supporting Cast: Water, Olive Oil, and Salt
- Water: Essential for semolina-based doughs and can be added sparingly to egg doughs if they appear too dry. [3]
- Olive Oil (Extra Virgin): A splash of good quality extra virgin olive oil adds elasticity and richness to the dough, helping it come together. [4]
- Salt (Sea Salt, Kosher Salt): Fine grain sea salt or Kosher salt are typically used. Salt not only seasons the dough but also plays a role in gluten development. Adding salt to the eggs ensures even distribution. [6]
Step-by-Step: How to Make Italian Pasta Dough at Home
This is where the magic begins. Follow these steps to create a perfect pasta dough, ready for shaping.
Gathering Your Tools and Ingredients
Before you start, make sure you have a clean, spacious work surface – a pastry board, a floured countertop, or a large table works perfectly. You’ll need your chosen flour, eggs (and possibly water, olive oil, and salt), a fork, and a bench scraper (optional but helpful). If you plan to use a stand mixer, ensure you have the dough hook attachment ready.
Forming the Dough Mound: The Traditional Method
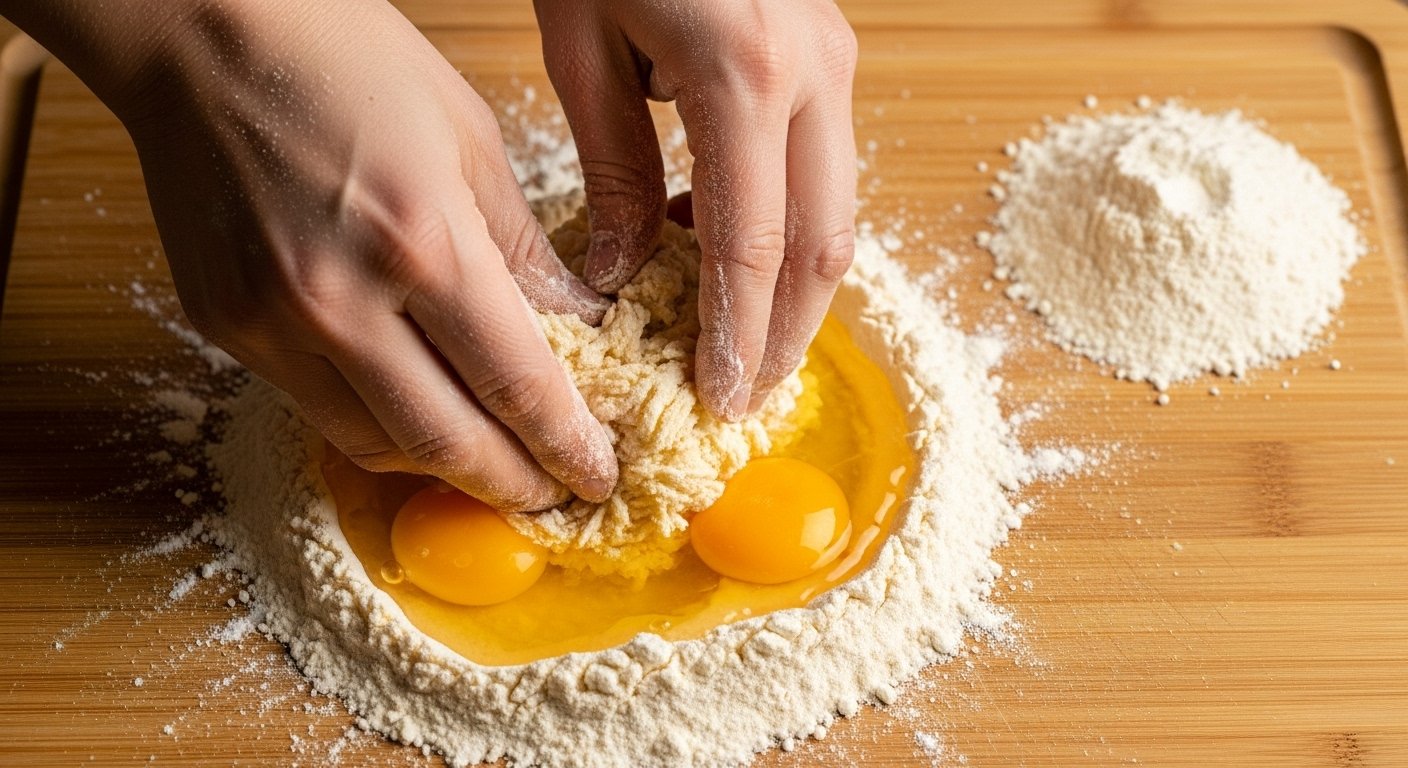
1. Create a Flour Well: On your work surface, mound the flour into a neat pile. Create a large well in the center, much like a volcano, with high walls to contain the wet ingredients. [1, 6]
2. Add Wet Ingredients: Crack your large, room temperature eggs directly into the well. If using, add the extra virgin olive oil and sea salt here too. [4, 6]
3. Whisk and Incorporate: Using a fork, gently whisk the eggs, slowly drawing in small amounts of flour from the inner walls of the well. Be careful not to break the walls too soon, or the eggs will spill out. Continue until a shaggy dough forms. [1, 4, 6]
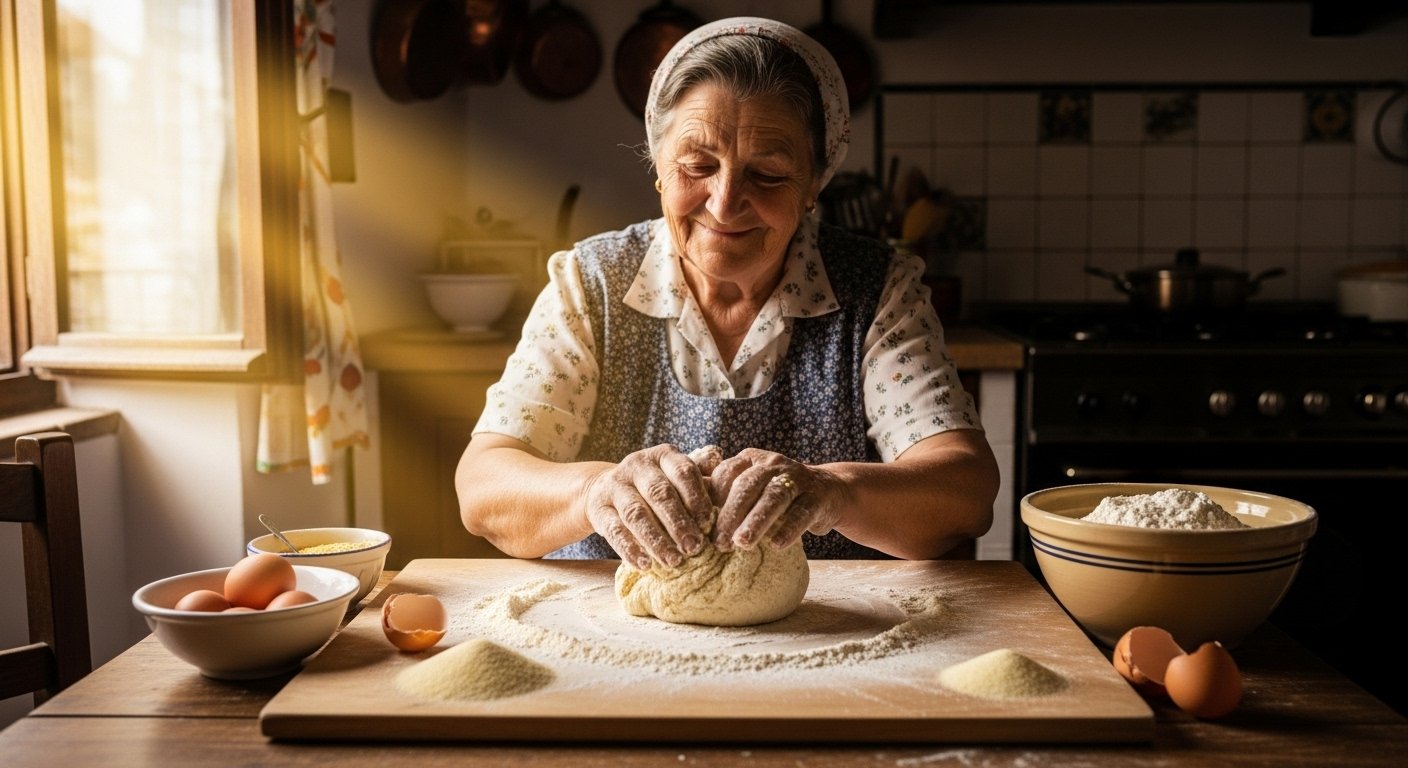
Kneading the Dough: Developing Gluten for Perfect Texture
Kneading is the most crucial step for developing the gluten in the flour, which gives the pasta its structure and elasticity. This process can be done by hand or with a stand mixer.
- By Hand (Traditional Method): Once the dough comes together into a shaggy ball, begin kneading. Use the heel of your hand to push and fold the dough, rotating it as you go. This requires consistent effort for at least 10-15 minutes. [1, 2, 4, 6] The dough consistency will transform from rough and sticky to smooth, elastic, and pliable. If the dough feels too dry, wet your hands with a few drops of water; if it’s too sticky, dust your floured surface with a little more flour. [1, 4]
- Stand Mixer: Attach the dough hook to your stand mixer. Combine the ingredients in the bowl and knead on medium speed for 6-7 minutes. [8] The mixer does the hard work, but keep an eye on the consistency, adding tiny splashes of water or dustings of flour as needed until the dough is silky and smooth. [8]
How do I know when my pasta dough is done kneading?
The dough is done kneading when it feels smooth and elastic, no longer sticky, and bounces back when gently pressed. A traditional sign mentioned by the Sfogline (Italian women who master pasta making by hand) is when the dough “sings” – tiny air bubbles popping under your palms. [1] Another visual cue is to cut the dough in half; if you see small air bubbles inside, it’s ready. [2]
Resting the Dough: A Vital Step
After kneading, resting the dough is non-negotiable. Wrap the dough tightly in plastic wrap or cover it with an overturned bowl to prevent it from drying out. Let it rest at room temperature for at least 30 minutes, or up to an hour. [2, 4, 6, 7] This resting period allows the gluten to relax, making the dough much easier to roll and less likely to tear. It also helps the flour fully hydrate. The humidity in your kitchen can affect the dough’s hydration, so adjust resting times slightly if it feels particularly dry or tacky.
Rolling and Shaping Your Fresh Pasta
Once rested, your pasta dough is ready to be transformed into beautiful sheets and shapes.
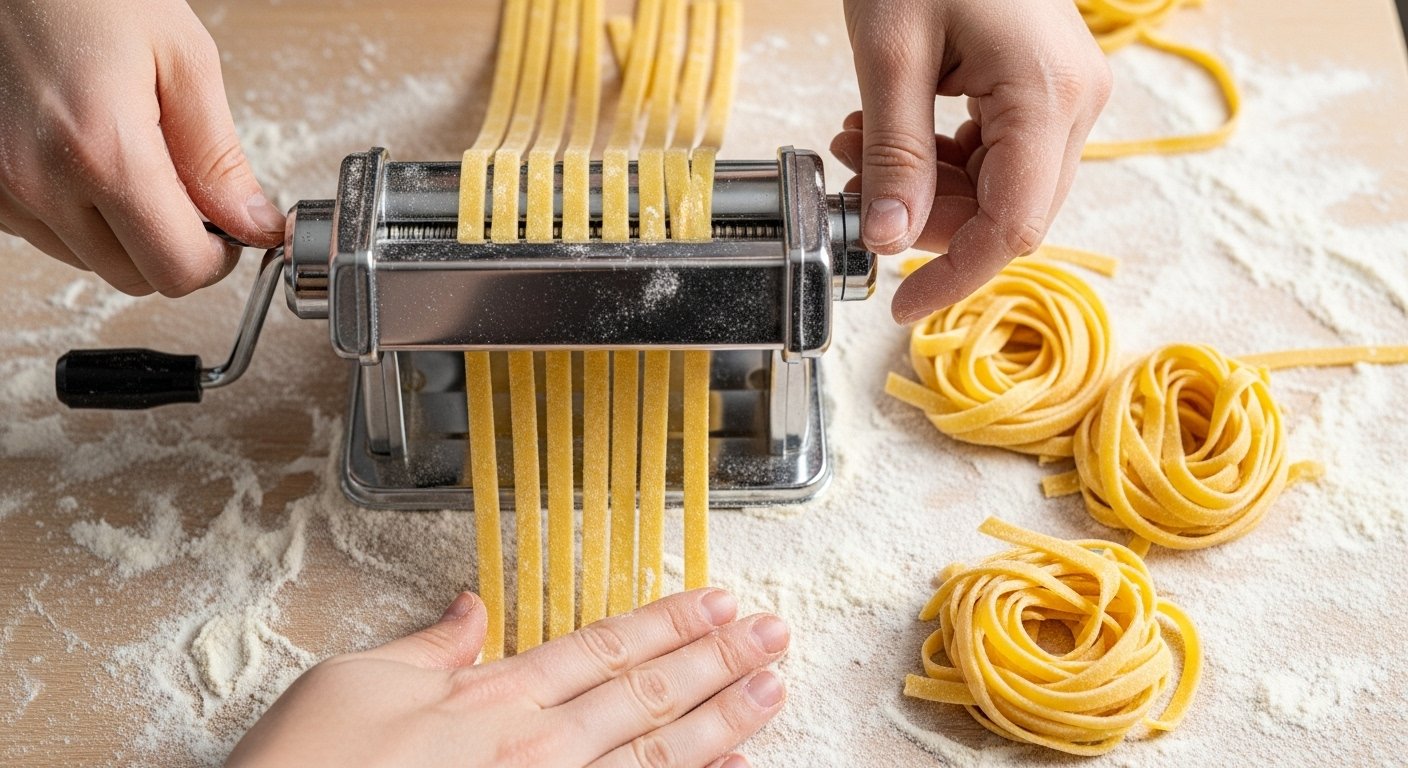
Using a Pasta Machine
A pasta machine is an invaluable tool for achieving consistently thin sheets. Both hand-cranked models (like the Marcato Atlas 150) and KitchenAid attachments work wonderfully. [8]
1. Divide and Flatten: Cut a quarter of your rested dough, keeping the rest covered. Flatten the piece into a rough oval or rectangle with your hands.
2. Initial Rolling: Pass the dough through the widest setting of your pasta machine. Fold the dough in half or in thirds (like a letter) and pass it through the widest setting again. Repeat this 3-4 times. This process, called laminating, further develops gluten and creates a smooth sheet. [2, 7]
3. Gradual Thinning: Reduce the setting by one notch and pass the dough through. Continue reducing the setting and passing the dough until you reach your desired thickness. For most pasta types, settings 5 or 6 on a 7-setting machine are ideal. Lightly flour the dough and the machine rollers if any sticking occurs. [2, 4, 6]
Rolling by Hand: The Art of the Sfogline
If you don’t have a pasta machine, a long rolling pin is all you need. This traditional method, often practiced by an Italian Nonna or a Sfogline, requires patience and practice. Flour your work surface generously and roll the dough out evenly, rotating it frequently and flipping it to ensure it doesn’t stick. Aim for a thickness similar to a thin piece of cardboard.
Cutting and Shaping Your Pasta
Once you have thin sheets of pasta, it’s time to cut and shape them:
- Noodle Attachments: Many pasta machines come with pasta cutter attachments for classic shapes like Tagliatelle (thicker flat noodles) and Fettuccine (slightly narrower). For Spaghetti, a specific round cutter attachment is needed. [1, 4]
- By Hand with a Knife: For shapes like tagliatelle or fettuccine, lightly flour your pasta sheet, then fold it loosely into a rectangle or roll it up like a scroll. Using a sharp knife, cut across the folded dough to create uniform strips. Precision in cutting is key, much like how to master basic knife skills for home cooks.
- Filled Pasta: For Ravioli or other filled pastas, you’ll use two sheets of pasta, placing dollops of filling between them, then sealing and cutting with a pasta cutter or knife.
- Lasagna Sheets: Simply cut your rolled pasta sheets to the size of your baking dish. For lasagna, a slightly thicker sheet works well. [6]
Cooking Your Homemade Pasta to Perfection
Cooking fresh pasta is quick and requires attention to detail to achieve the perfect al dente texture.
1. Boiling Water: Use a large pot of rapidly boiling water. Fresh pasta needs ample space to cook evenly without sticking.
2. Generous Salting: Season the boiling water generously with Kosher salt or sea salt until it tastes like the sea. This is your only chance to season the pasta itself. [4]
3. Cook Quickly: Fresh pasta cooks much faster than dried pasta, typically in 1-4 minutes, depending on its thickness. [1, 4] Keep a close eye on it, testing for al dente – tender but with a slight bite.
4. Sauce It Up: Once cooked, drain the pasta (reserving some pasta water) and immediately toss it with your favorite sauce. Classic pairings include rich Bolognese sauce for heartier shapes or a vibrant Pomodoro sauce for lighter, egg-based noodles. The reserved pasta water can be used to loosen the sauce and help it emulsify with the pasta.
Storing and Preserving Fresh Pasta
Making a large batch of fresh pasta is a great idea, and luckily, it’s easy to store for later enjoyment.
- Immediate Use: If using within a few hours, simply lay the cut pasta on a lightly floured baking sheet or hang it on a drying rack to prevent sticking.
- Refrigeration: Fresh pasta can be refrigerated for 1-2 days. Dust it lightly with flour or semolina and store it in an airtight container or bag.
- Freezing Pasta: For longer storage, you can freeze pasta. Arrange individual nests of pasta on a floured baking sheet and freeze until solid. Once frozen, transfer the pasta to a freezer-safe bag or container. It will keep for up to a month. Cook directly from frozen, adding a minute or two to the cooking time.
Common Mistakes When Making Homemade Pasta
Even experienced cooks can make mistakes. Here are some common pitfalls and how to avoid them:
- Not Kneading Enough: Insufficient kneading results in a weak, crumbly dough that’s difficult to roll and will yield soft, mushy pasta. Ensure you knead for at least 10 minutes to develop strong gluten. [1, 2]
- Not Resting the Dough: Skipping the resting step leads to a tight, springy dough that resists rolling, making it prone to tearing. Always allow at least 30 minutes for the gluten to relax. [2, 7]
- Too Much Flour (or Too Little): This affects the dough’s consistency. Too much flour makes it dry and crumbly; too little makes it sticky and difficult to handle. Adjust gradually, considering the humidity of your environment.
- Over-Boiling: Fresh pasta cooks quickly. Over-boiling will turn your delicate noodles into a gummy mess. Taste frequently to achieve that perfect al dente bite.
- Not Salting the Water: Bland pasta is a common complaint. The salt in the boiling water is crucial for seasoning the pasta from the inside out. [4, 6]
Conclusion
Embarking on the journey of how to make Italian pasta at home is a rewarding experience that deepens your connection to food and tradition. From the tactile pleasure of kneading the perfect pasta dough to the satisfying slurp of your homemade Tagliatelle or Ravioli, every step is a testament to the joy of cooking. Armed with the right ingredients, tools, and a bit of patience, you too can become a home sfoglina, bringing the authentic flavors of Italy right to your dining table. So, roll up your sleeves, gather your ingredients, and prepare to impress yourself and your loved ones with the incredible taste of fresh, homemade Italian pasta. Buon appetito!
Authoritative Outbound Links:
- My Italian Flavors – How to Make Fresh Pasta [1]
- Inside The Rustic Kitchen – Homemade Pasta Dough [2]
- Home Cooking Collective – A Guide to Making Great Homemade Pasta [3]
Frequently Asked Questions
How do I know when my pasta dough is done kneading?
Your pasta dough is done kneading when it feels smooth, elastic, and pliable, and springs back when gently pressed. If cutting it in half, you should see tiny air bubbles inside. An experienced Italian Nonna might say it’s done when the dough ‘sings’ – small bubbles popping under your palms. [1, 2, 3]
What are some common mistakes when making homemade pasta?
Common mistakes include not kneading the dough long enough (leading to crumbly pasta), skipping the resting period (making the dough hard to roll), using too much or too little flour, overcooking the fresh pasta, and not adequately salting the boiling water. Over-boiling is especially common as fresh pasta cooks very quickly. [1, 2, 4, 6]
Which flour should you use for perfect homemade pasta?
For perfect homemade pasta, ’00’ flour is traditionally recommended for silky, egg-based Northern Italian pastas. Semolina flour (durum wheat semolina) is ideal for chewy, eggless Southern Italian pastas. However, good quality all-purpose flour can also yield excellent results, especially for beginners. You can also experiment with blends. [3, 4, 6]
Can you store fresh pasta?
Yes, fresh pasta can be stored. For short-term use (1-2 days), dust it with flour or semolina and refrigerate in an airtight container. For longer storage, you can freeze it. Form nests of pasta, freeze them on a floured baking sheet until solid, then transfer to a freezer-safe bag or container for up to a month. Cook directly from frozen. [3]
How long does fresh pasta take to cook?
Fresh pasta cooks much faster than dried pasta. Depending on its thickness and shape, it typically takes only 1 to 4 minutes to cook to an al dente texture in generously salted, rapidly boiling water. Always taste test frequently to avoid overcooking. [1, 4]