Starting seeds indoors is a rewarding way to get a jump start on your gardening season, ensuring you enjoy earlier blooms and more abundant harvests. If you’ve ever wondered how to start seeds indoors like the pros, you’re in the right place! This comprehensive guide will walk you through every step, from setting up your indoor seed starting environment to transplanting your robust seedlings into the garden. It’s an excellent way to extend your growing season with seeds and cultivate unique varieties not found in local nurseries. Even if you’re a beginner, with the right knowledge and a bit of care, you’ll be well on your way to a thriving garden.
Planning Your Indoor Seed Starting Adventure
The first step to success is knowing when to start seeds indoors. This crucial timing depends on your last frost date and the specific plant’s “days to maturity” or “start indoors” recommendation found on seed packets. Generally, most vegetables and flowers are started 6-8 weeks before the last expected frost. Look up your local frost dates, then count backward. This simple planning ensures your seedlings are ready for the garden at the ideal time, promoting an early vegetable harvest and vibrant flower displays.

Essential Indoor Seed Starting Setup
A proper indoor seed starting setup doesn’t have to be complicated or expensive, but a few key items will make all the difference. Having a dedicated seed starting supplies list ready will prevent last-minute rushes and ensure a smooth process. Here’s what you’ll need:
- Seed Trays or Pots: Look for trays with drainage holes. Small cell packs are great for individual seeds, or you can use larger flats for broadcast sowing. Clean, recycled containers work too, as long as they have drainage.
- Humidity Domes: These covers fit over seed trays and create a mini-greenhouse effect, crucial for germination.
- Watering Can or Spray Bottle: A gentle flow or mist is essential to avoid disturbing tiny seeds.
- Labels: Essential for keeping track of what you’ve planted where!
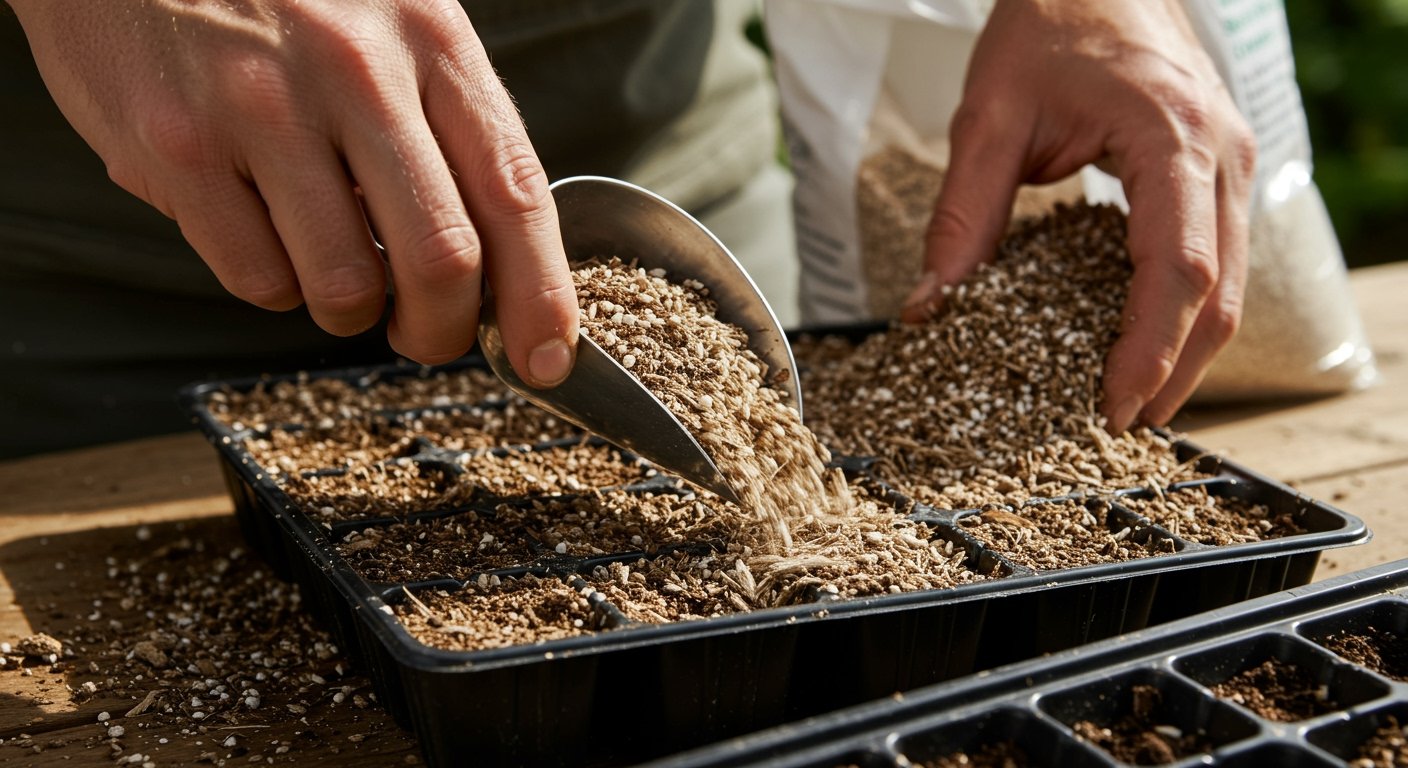
Choosing the Best Soil for Seed Starting
Do not use garden soil or potting mix for your seeds. Garden soil can compact and contains weed seeds and pathogens. Instead, opt for a sterile, lightweight best soil for seed starting mix. These specialized mixes are fine-textured, peat- or coir-based, and provide excellent drainage and aeration, which are vital for delicate new roots. They are specifically formulated to hold moisture without becoming waterlogged and are free of pests and diseases that can harm young seedlings.
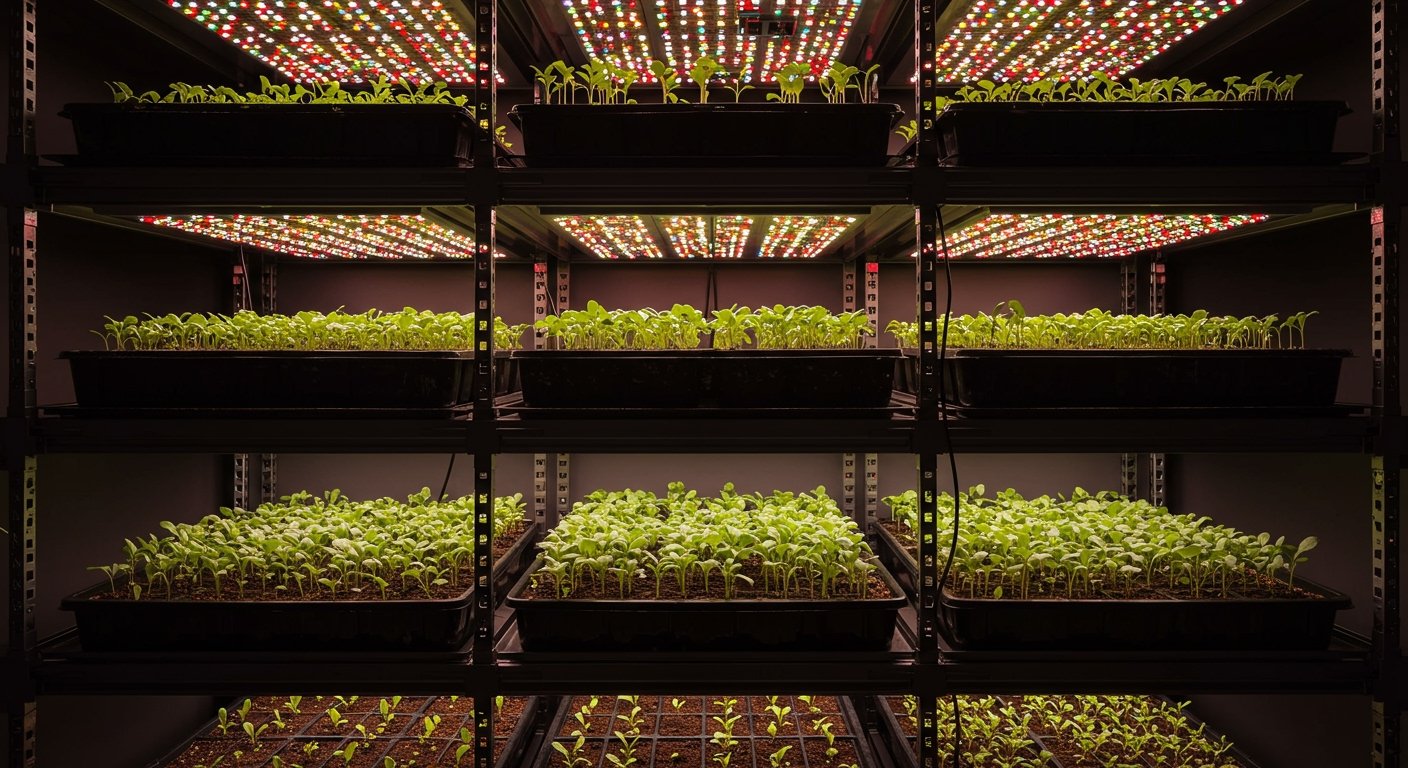
The Importance of Grow Lights for Seeds
One of the most critical components of your indoor seed starting setup is adequate light. Natural window light, even a south-facing one, is rarely enough to prevent preventing leggy seedlings. This is where grow lights for seeds come in. LED grow lights are energy-efficient and provide the full spectrum of light plants need. Position them just a few inches above your seedlings, moving them up as the plants grow. A timer set for 14-16 hours of light per day is ideal, mimicking a long summer day.
The Seed Starting Process: Step-by-Step
Once you have your supplies, the actual planting is straightforward. Follow these steps for successful flower seed germination indoors and vegetable starts:
1. Prepare your soil: Moisten your seed starting mix before filling trays. It should be damp but not soggy.
2. Fill trays: Gently fill your chosen containers with the moist mix, leveling it off without compacting too much.
3. Planting seeds: Follow packet instructions for planting depth. A general rule is to plant seeds at a depth two to three times their width. Tiny seeds can be sprinkled on the surface.
4. Watering: After planting, gently water again with a fine mist or bottom-water by placing trays in a shallow pan of water until the surface is damp.
5. Label: Don’t forget to label each tray or cell immediately.
6. Cover: Place humidity domes over your trays to maintain moisture and warmth.
Watering and Humidity: Getting it Just Right
Proper watering seed starting is key to success. Too much water leads to damping-off disease, while too little can prevent germination. Keep the soil consistently moist, like a wrung-out sponge. Use a spray bottle for surface watering or bottom-water to encourage roots to grow downwards. The humidity dome helps keep moisture in, but once seeds sprout, vent the dome or remove it to allow for air circulation and prevent fungal issues.
Temperature Control for Optimal Germination
Most seeds germinate best in a warm environment. The ideal seed starting temperature is typically between 65-75°F (18-24°C). Many gardeners use a seedling heat mat placed under their trays to provide consistent bottom heat, which significantly speeds up germination, especially for heat-loving plants. Once seedlings emerge, you can remove them from the heat mat if your room temperature is consistent, though some plants benefit from continued warmth.
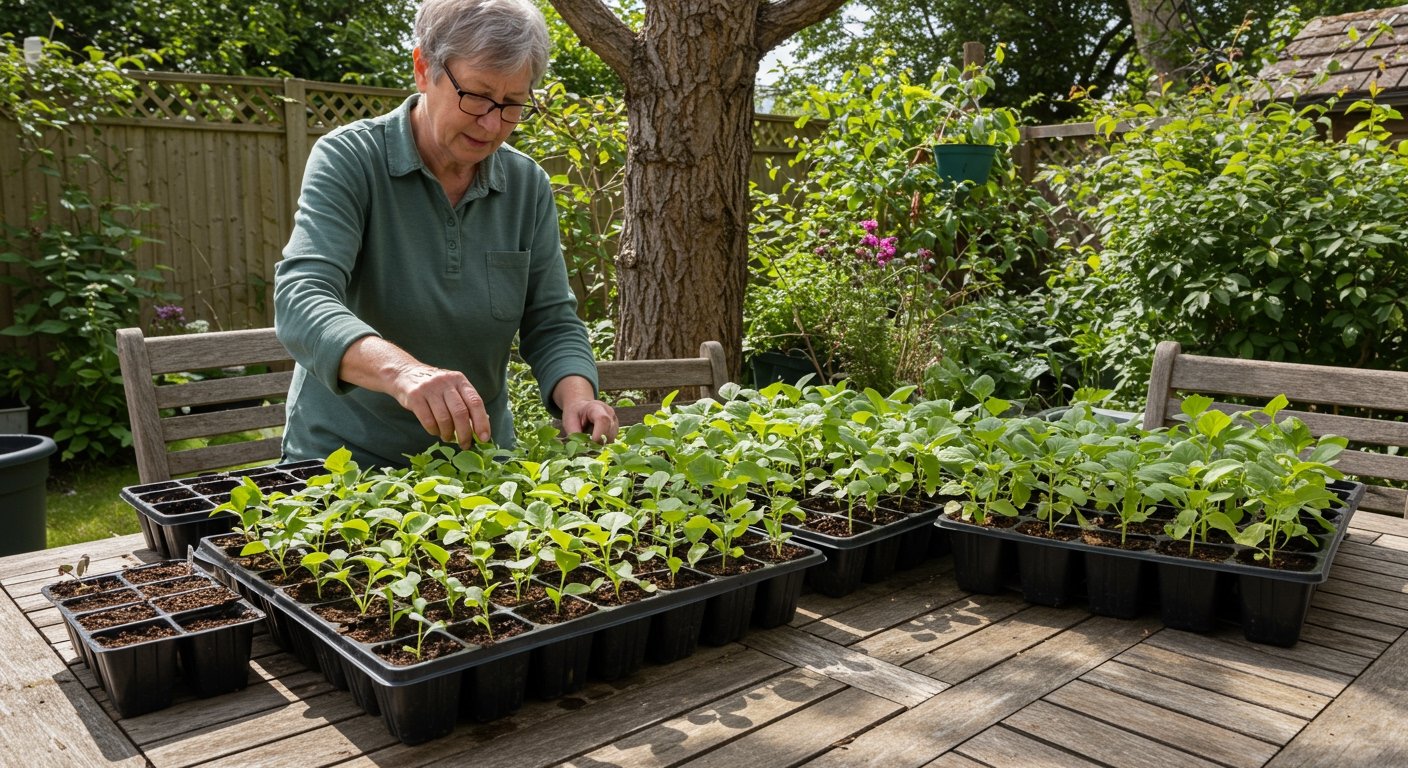
Caring for Your Young Seedlings
Once your seeds have sprouted, the real seedling care guide begins. Young seedlings are delicate and require consistent attention to grow into strong, healthy plants ready for the garden.
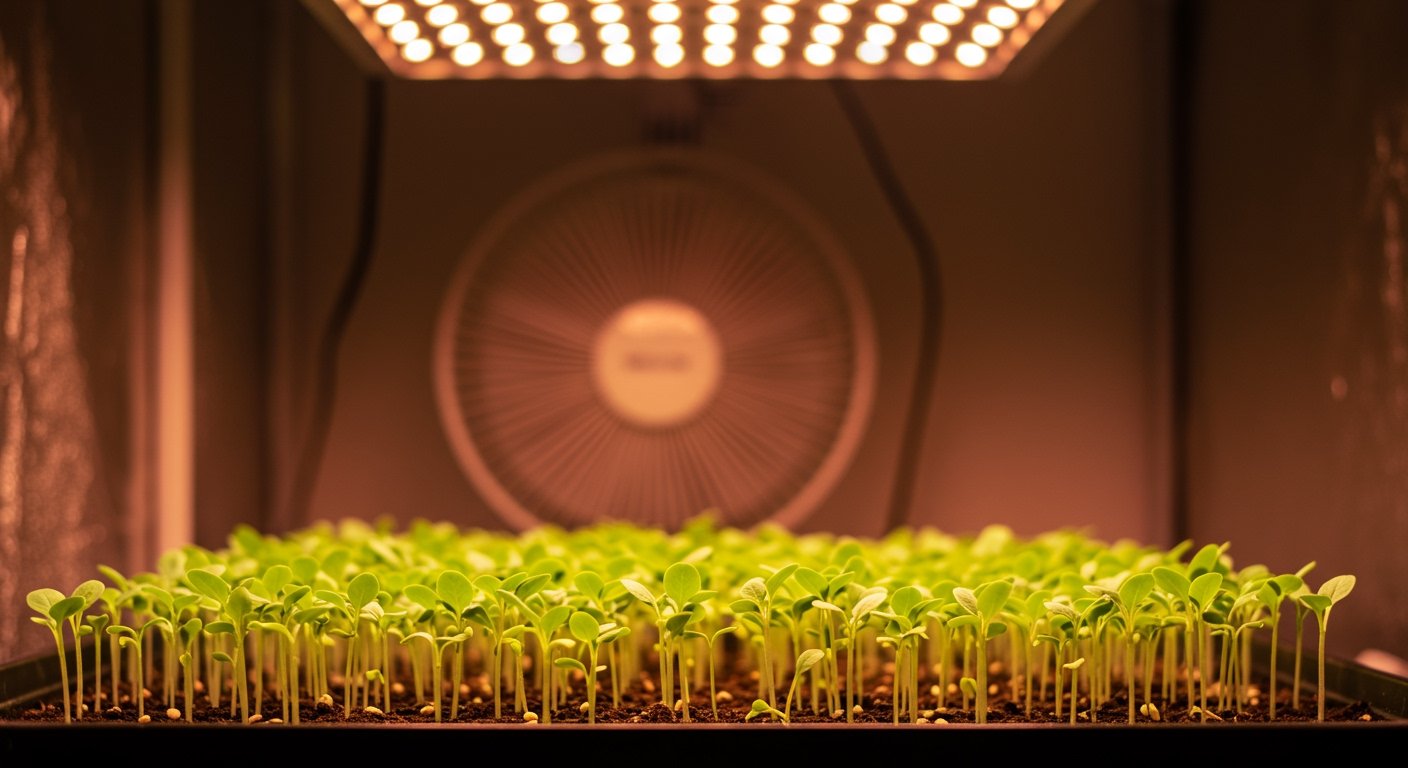
- Light: Ensure grow lights are just a few inches above the seedlings, adjusting as they grow to maintain closeness. This is crucial for preventing leggy seedlings.
- Watering: Continue to keep the soil moist but not soggy. As seedlings grow, their water needs increase.
- Air Circulation: Gentle air movement, from a small fan on a low setting, strengthens stems and helps prevent fungal diseases.
- Fertilizing: Once true leaves appear, you can start feeding with a diluted, balanced liquid fertilizer (e.g., half-strength organic fertilizer) every two weeks. Don’t fertilize too early or too much.
Preventing Leggy Seedlings
Preventing leggy seedlings (tall, thin, and weak stems) is one of the biggest challenges for indoor growers. This typically happens due to insufficient light. To combat this:
- Maximize light: Ensure your grow lights are close enough to the seedlings. The light should be almost touching the top leaves.
- Use a fan: A gentle breeze from a small fan helps strengthen stems, mimicking outdoor conditions.
- Rotate trays: Turn your seedling trays regularly if using natural light to ensure even light exposure.
- Prune (occasionally): For some plants, pinching back can encourage bushier growth.
Hardening Off Seedlings
Before transplanting seedlings directly into the garden, they need to gradually adjust to outdoor conditions. This process, known as hardening off seedlings, prepares them for sun, wind, and fluctuating temperatures. Start by placing them outdoors in a sheltered, shady spot for a few hours each day, gradually increasing their exposure to sun and wind over 7-14 days. Bring them indoors at night if temperatures drop or severe weather is expected. Skipping this step can shock your plants and set back their growth significantly.
Transplanting Seedlings to the Garden
Once your seedlings are hardened off and all danger of frost has passed, it’s time for transplanting seedlings to their permanent home. Dig a hole slightly larger than the seedling’s root ball. Gently remove the seedling from its tray, being careful not to damage the roots. Place it in the hole, backfill with soil, and water thoroughly. For some plants, like tomatoes, you can plant them deeper than they were in their trays to encourage more root growth.
Common Seed Starting Mistakes and How to Avoid Them
Even experienced gardeners make mistakes, but being aware of common pitfalls can help you avoid them. This helps in understanding a comprehensive seedling care guide.
- Overwatering: Leads to damping-off disease. Always check soil moisture before watering.
- Insufficient Light: Results in leggy seedlings. Use proper grow lights and keep them close.
- Planting Too Early/Late: Misjudging when to start seeds indoors can lead to seedlings that are too big or too small for transplanting. Consult seed packets and frost dates.
- Using the Wrong Soil: Garden soil is too heavy and unsterile. Always use a dedicated best soil for seed starting mix.
- Skipping Hardening Off: Causes transplant shock. Always acclimatize your seedlings.
Enjoy the Rewards: Early Blooms and Harvests
By successfully starting seeds indoors, you gain a significant advantage. You’ll experience an early vegetable harvest, enjoying fresh produce weeks before your neighbors. For flowers, it means earlier, more vibrant blooms that can last longer into the season. This method is truly about extending growing season with seeds, allowing you to cultivate a wider variety of plants and enjoy the fruits (and vegetables, and flowers) of your labor for a much longer period. Happy growing!
Frequently Asked Questions
When should I start seeds indoors?
The best time to start seeds indoors depends on your local last frost date and the specific plant’s requirements, usually found on the seed packet. Most plants are started 6-8 weeks before the last expected frost. Use an online frost date calculator for your region.
What are leggy seedlings and how can I prevent them?
Leggy seedlings are tall, thin, and weak, typically caused by insufficient light. To prevent this, ensure your grow lights are just a few inches above the seedlings and consider using a small fan to promote stronger stem growth.
Why is hardening off important before planting outdoors?
Hardening off is the process of gradually acclimatizing your indoor-grown seedlings to outdoor conditions before transplanting. Over 7-14 days, expose them to increasing amounts of sun, wind, and cooler temperatures to prevent transplant shock.
What kind of soil should I use for starting seeds indoors?
For seed starting, use a sterile, lightweight seed starting mix. It’s specially formulated for young seedlings, offering excellent drainage and aeration, and is free of weed seeds and pathogens found in garden soil or regular potting mix.
Do seedlings need fertilizer?
Yes, once your seedlings have developed their first set of true leaves, you can begin to fertilize them with a very diluted, balanced liquid fertilizer (e.g., half strength). Fertilizing too early or too strong can damage young roots.