Transforming your living space with beautifully arranged wall art is one of the most rewarding aspects of home decor. However, the thought of hanging pictures straight, securing heavy mirrors, or creating an intricate gallery wall can often feel daunting. This is where the right home decor tools, especially a solid set of picture hanging tools, become absolute game-changers. With the global wall art market valued at an impressive USD 63.61 billion in 2024, it’s clear that adorning our walls remains a significant trend. What’s more, a substantial 62% of American homeowners planned home renovations in 2024, with 43% opting for DIY projects, highlighting a growing confidence in tackling home improvements themselves. Yet, the journey isn’t without its pitfalls: 44% of DIYers admit to making mistakes and redoing tasks, and 33% have used the wrong tool. This guide is designed to equip you with the knowledge and the essential wall art tools to master mounting and wall art installation like a pro, avoiding common errors and achieving flawless results every time.
What are the Essential Tools for Hanging Pictures? A Pro’s Toolkit
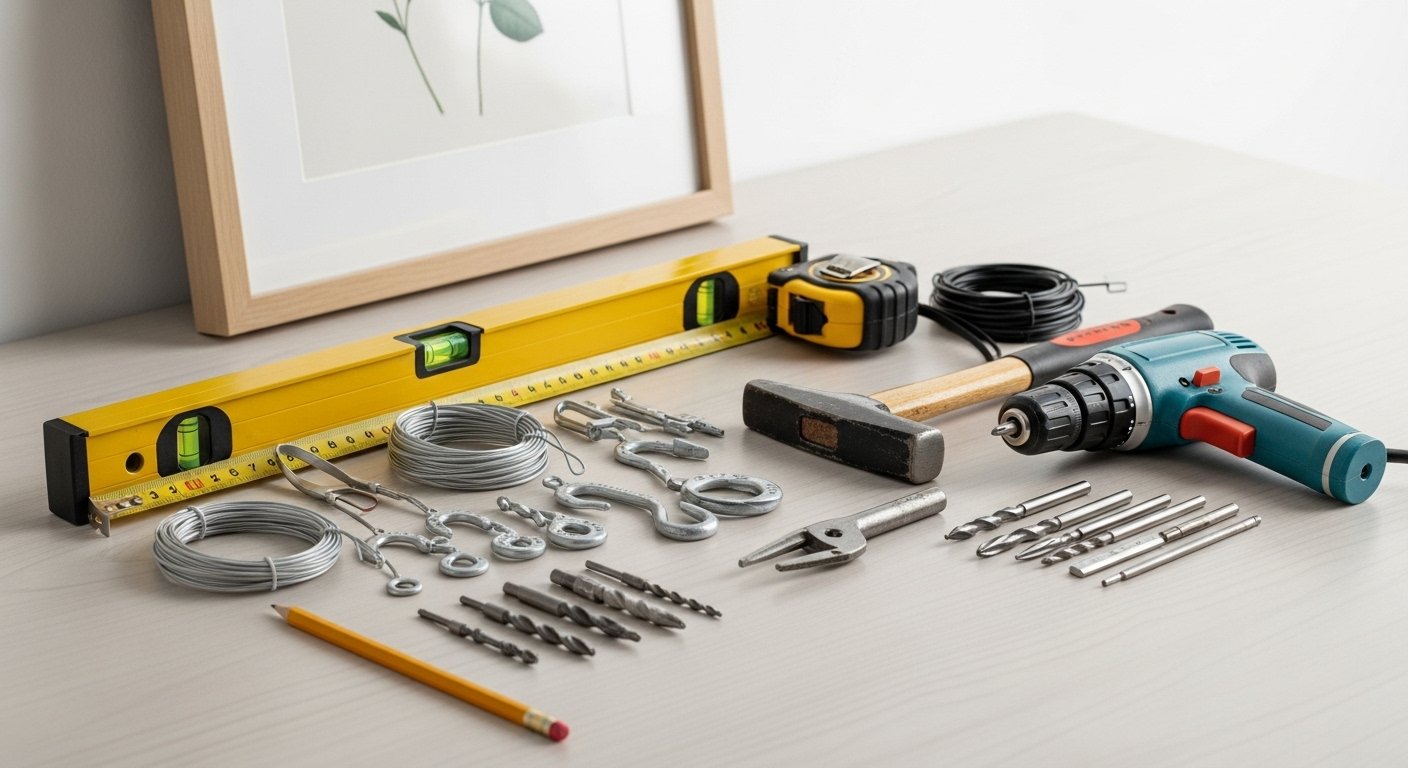
To confidently hang anything from a light photograph to a heavy mirror, you’ll need more than just a hammer and a nail. Mastering the art of wall decor begins with assembling the right picture hanging tools. Here’s a list of indispensable items that belong in every DIYer’s arsenal, ensuring your projects are not only beautiful but also secure:
Deep Dive into Essential Picture Hanging Tools: Your Toolkit for Success
Understanding each tool’s purpose and how to use it correctly is key to transforming your walls with confidence. The global household hand tools market was valued at USD 20.46 billion in 2024 and is projected to reach USD 37.93 billion by 2033, growing at a CAGR of 7.1%. This growth reflects the increasing demand for quality tools as more people embrace DIY. Let’s explore the home decor mounting tools that will elevate your hanging game.
Measuring Tape and Pencil: The Foundation of Precision
Every successful wall art installation begins with precise measurements. A reliable measuring tape and a pencil are your first picture hanging tools. They allow you to accurately determine placement, spacing, and height before a single hole is made. Remember, measuring twice and marking once can save you from unnecessary wall damage. For more on getting your walls ready for perfection, check out our guide on painting perfection: best home decor tools for walls.
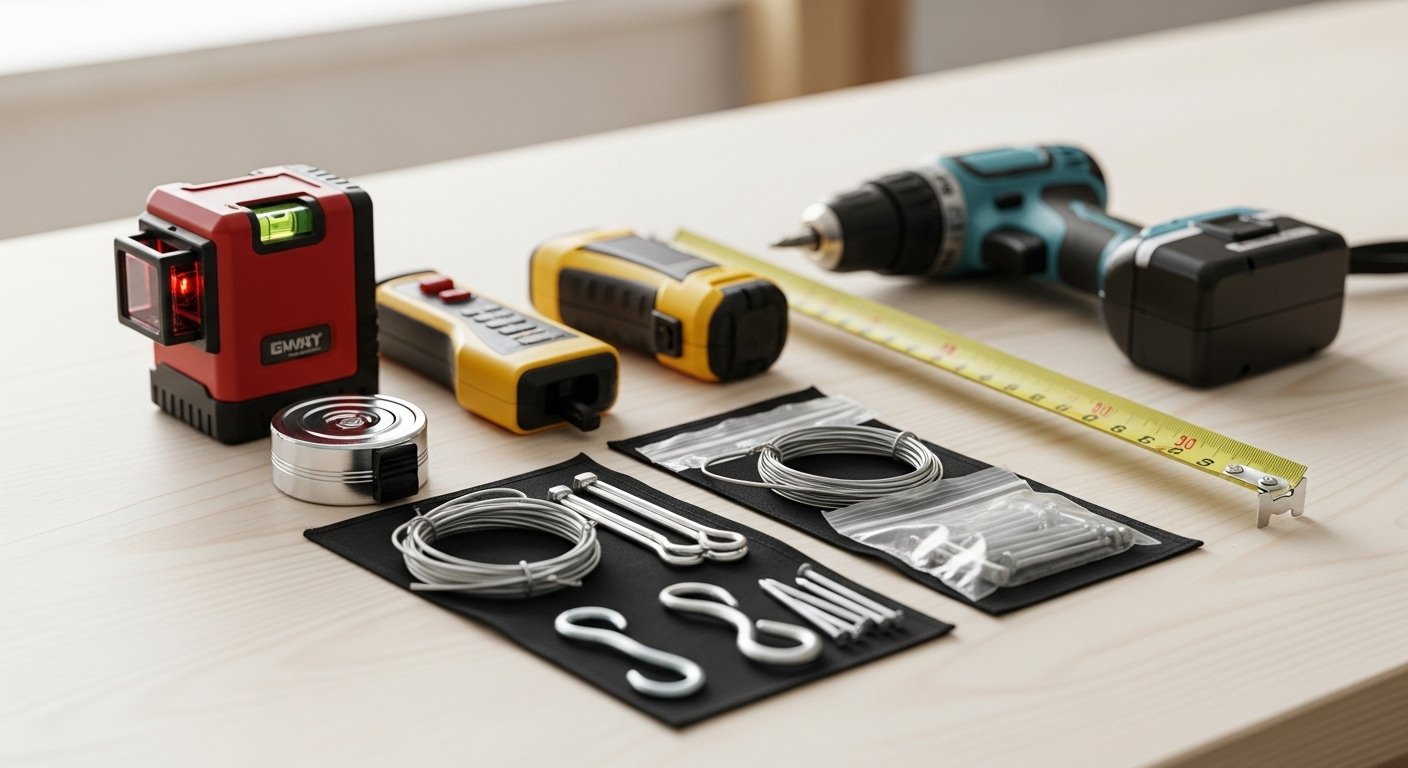
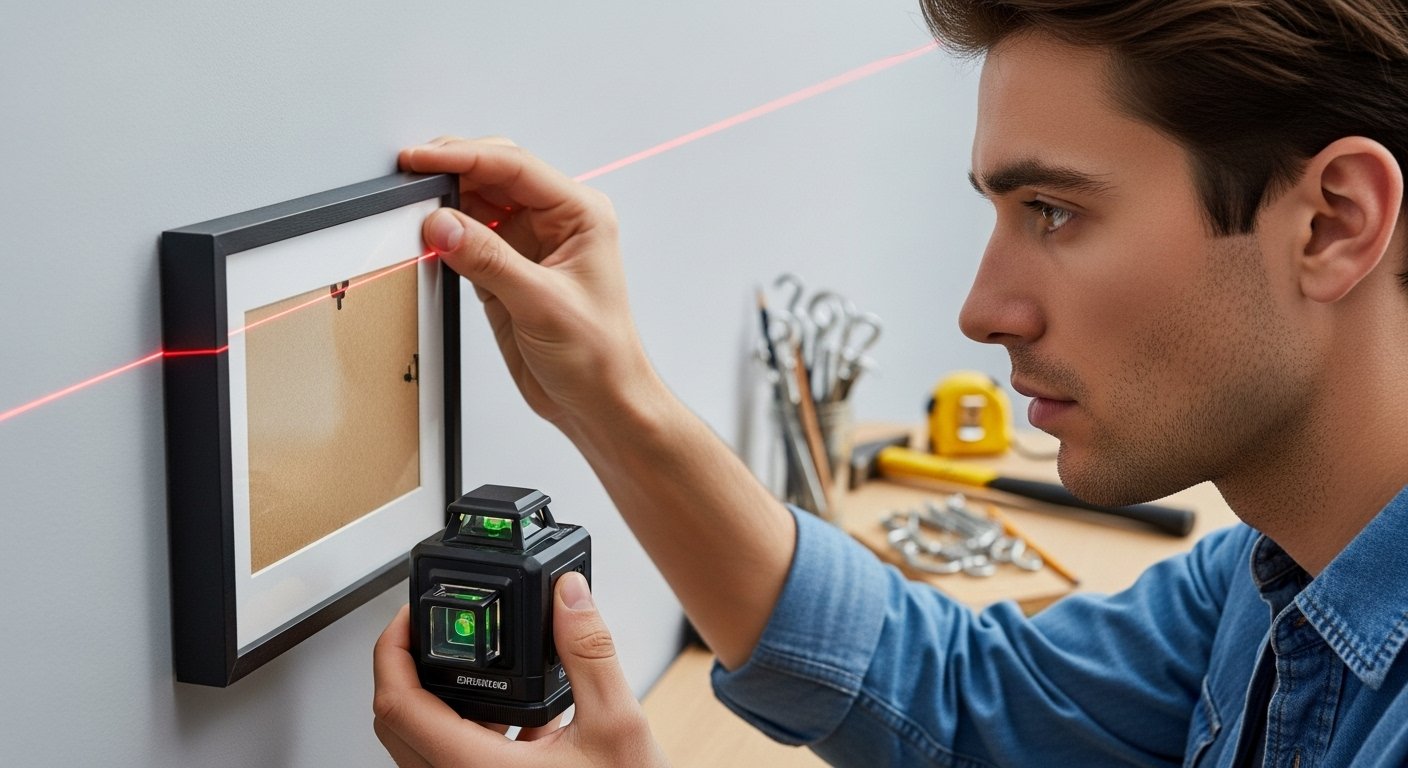
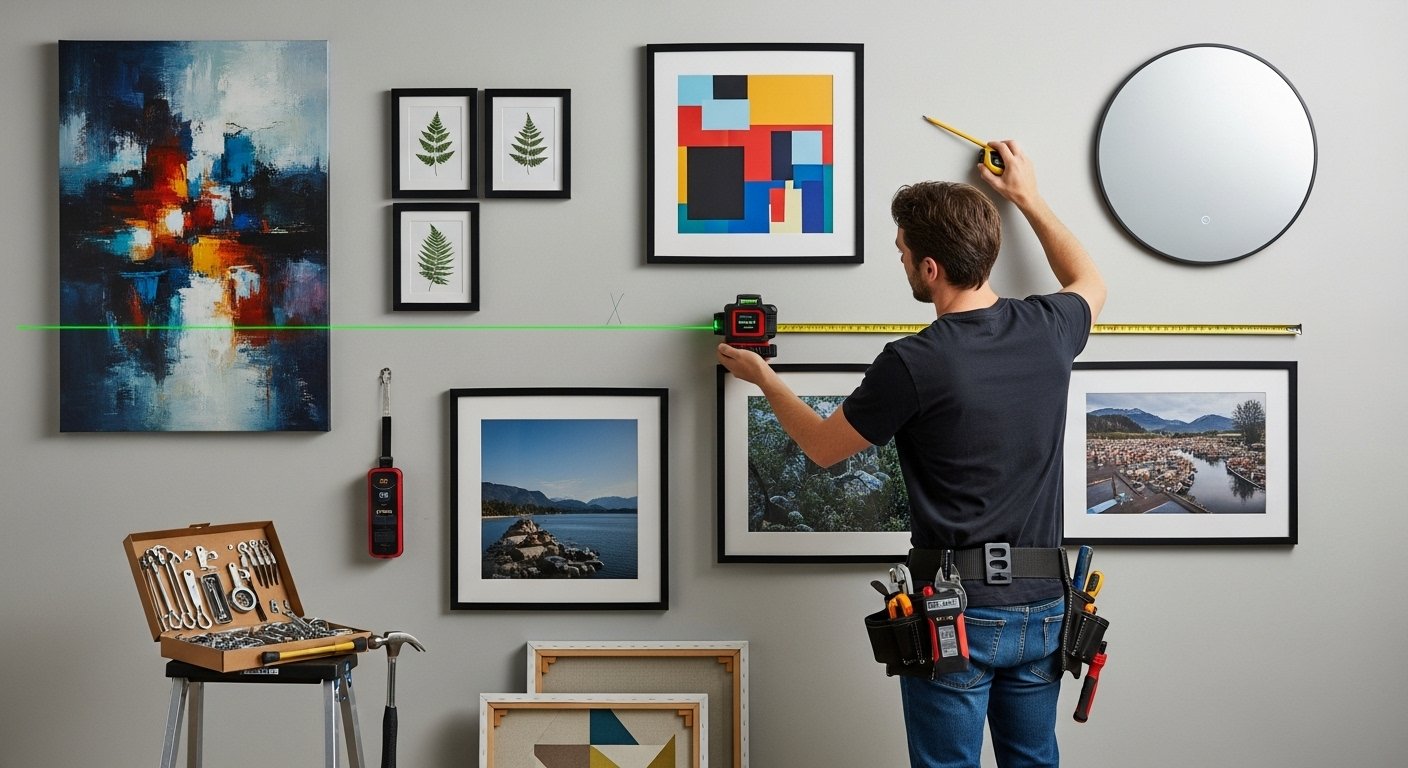
Leveling Tool for Wall Art: Achieving Perfect Alignment
Nothing detracts from beautiful wall art like a crooked hang. A leveling tool for wall art is indispensable for ensuring your pieces are perfectly straight. While a traditional spirit level is effective for single frames, a Laser Level offers unparalleled accuracy for multiple frames or creating gallery walls. It projects a perfectly straight line across your wall, serving as a visual guide. This is one of the best picture hanging tools for multiple frames and a favorite among those who want their art to look professionally hung.
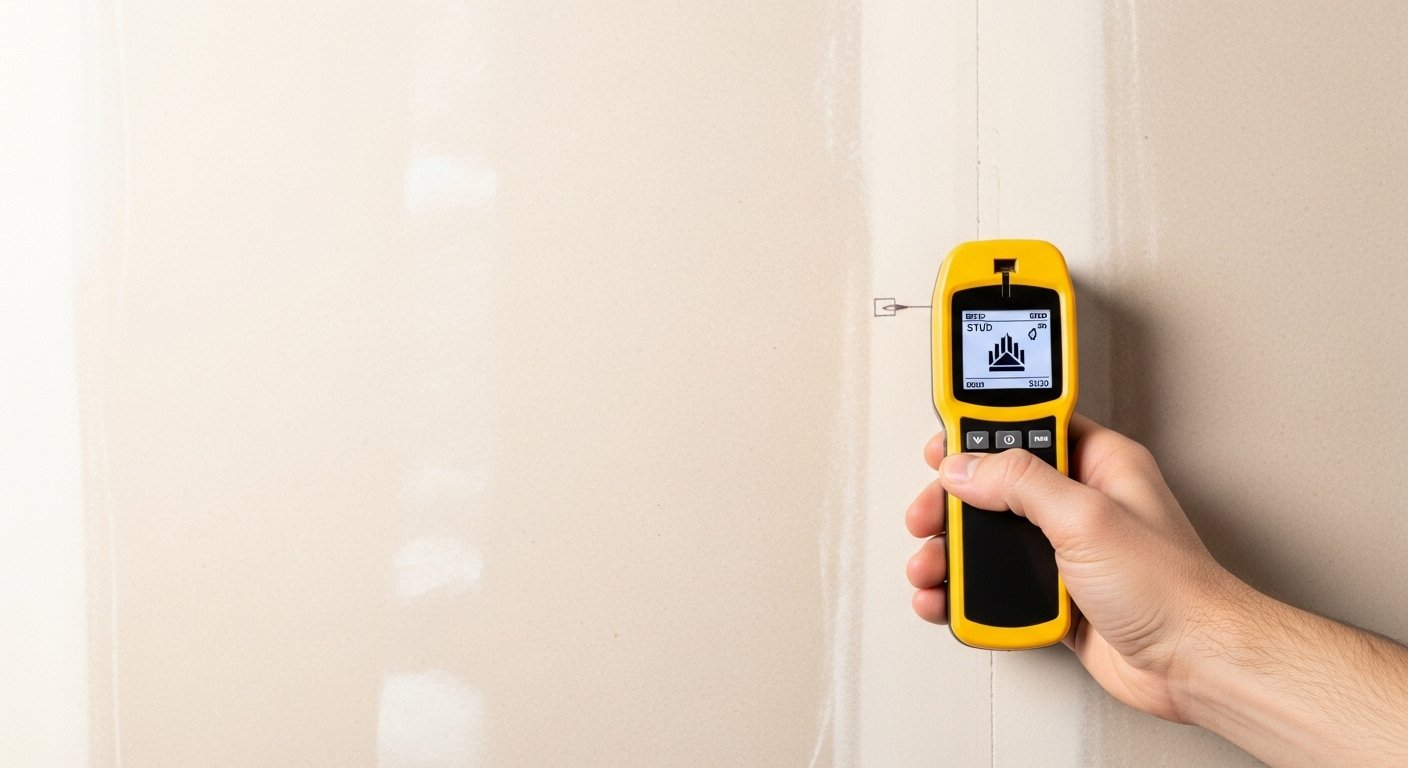
Stud Finder for Hanging Pictures: The Weight-Bearing Hero
For anything substantial, like tools to hang heavy pictures or large mirrors, a Stud Finder is non-negotiable. Drywall alone cannot support significant weight. A stud finder helps you locate the wooden studs behind your drywall, which are strong enough to bear heavy loads. Using a stud finder prevents your valuable art from crashing down and avoids unnecessary holes in your wall. This directly addresses the PAA question: “How do you hang a heavy picture frame?” by emphasizing proper structural support.
Drill and Bits: Power and Precision
A cordless Drill and Bits are essential wall art installation tools for creating pilot holes for screws and installing various types of anchors. Having a range of drill bit sizes is important to match the specific picture hanging hardware you plan to use, ensuring a snug and secure fit. Remember to always use the appropriate drill bit for your wall material.
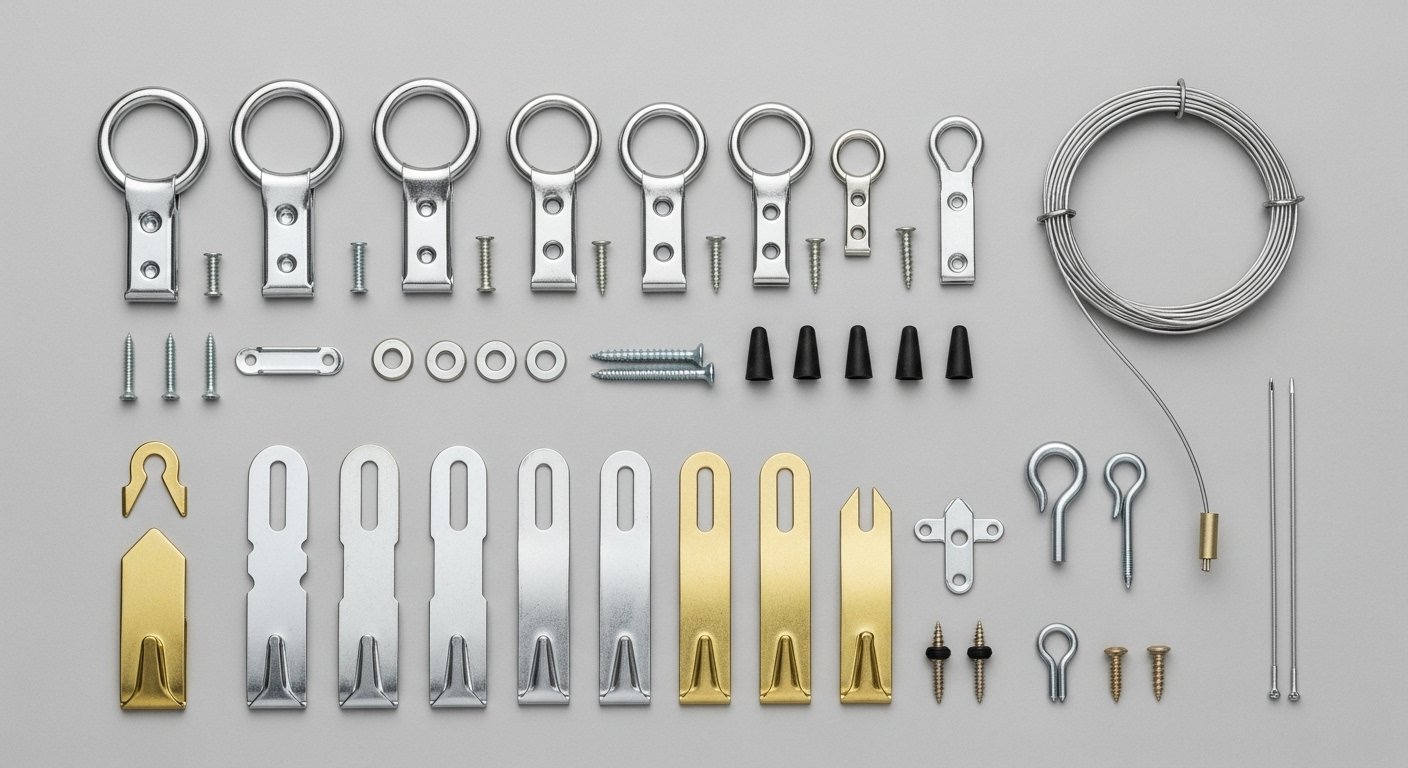
Picture Hanging Kits: Your All-in-One Solution
For a convenient start, a good Picture Hanging Kit provides a variety of hooks, nails, and sometimes even wire. These kits are excellent for lighter to medium-weight frames and simplify the process of hanging various items. Look for kits that offer a range of weight capacities to cover different needs, from small photos to moderately sized art pieces. Many kits available on platforms like “picture hanging tool Amazon” or “picture hanging tool Home Depot” offer comprehensive selections.

Drywall Anchors and Screws: Beyond the Studs
When a stud isn’t where you need it, Drywall Anchors come to the rescue. These specialized fasteners are designed to expand or toggle behind the drywall, creating a secure point for screws. They are vital for tools to hang heavy pictures where studs are absent and for achieving damage-free picture hanging tools results (or at least minimizing damage compared to an unsupported screw). There are various types, including self-drilling anchors, expandable metal anchors (Molly bolts), and toggle bolts, each with different weight capacities. For instance, toggle bolts are often considered among the strongest drywall anchors, suitable for heavy-duty applications. Drywall anchors are designed to create a strong mount point by distributing the applied load over an increased surface area. [2, 10]
French Cleat System: The Professional’s Secret for Heavy Loads
For the heaviest artwork, large mirrors, or custom shelving, the French Cleat System is the gold standard. This elegant solution consists of two interlocking strips (typically wood or metal) with a 45-degree bevel. One strip is securely mounted to the wall (ideally into studs), and the other is attached to the back of the item. The item then simply slides down onto the wall-mounted cleat, creating an incredibly strong and almost invisible hold. A French cleat is a way of securing a cabinet, mirror, tools, artwork or other objects to a wall. [1] This method provides exceptional stability and ensures your most prized pieces are hung safely and securely. It’s a favorite among professional picture hanging tools and ensures a flush, stable mount.
Mastering Picture Hanging Techniques Like a Pro
Having the right home decor mounting tools is only half the battle; knowing how to use them effectively is what truly sets a pro apart. With U.S. consumers spending an average of USD 1,598 per year on home decor, ensuring your efforts yield stunning results is crucial.
How to Measure for Hanging Pictures: The Eye-Level Rule
A common question is, “How high should art be hung?” A widely accepted guideline, often called the “eye-level rule” or “57-inch rule,” suggests that the center of your artwork should be approximately 57-60 inches (145-152 cm) from the floor. This height aligns with the average human eye level, making the art comfortable to view. [3, 4, 5] Adjust this based on your ceiling height, surrounding furniture, and personal preference. When hanging a piece above furniture, ensure there’s enough space, typically 6-8 inches, between the bottom of the frame and the top of the furniture.
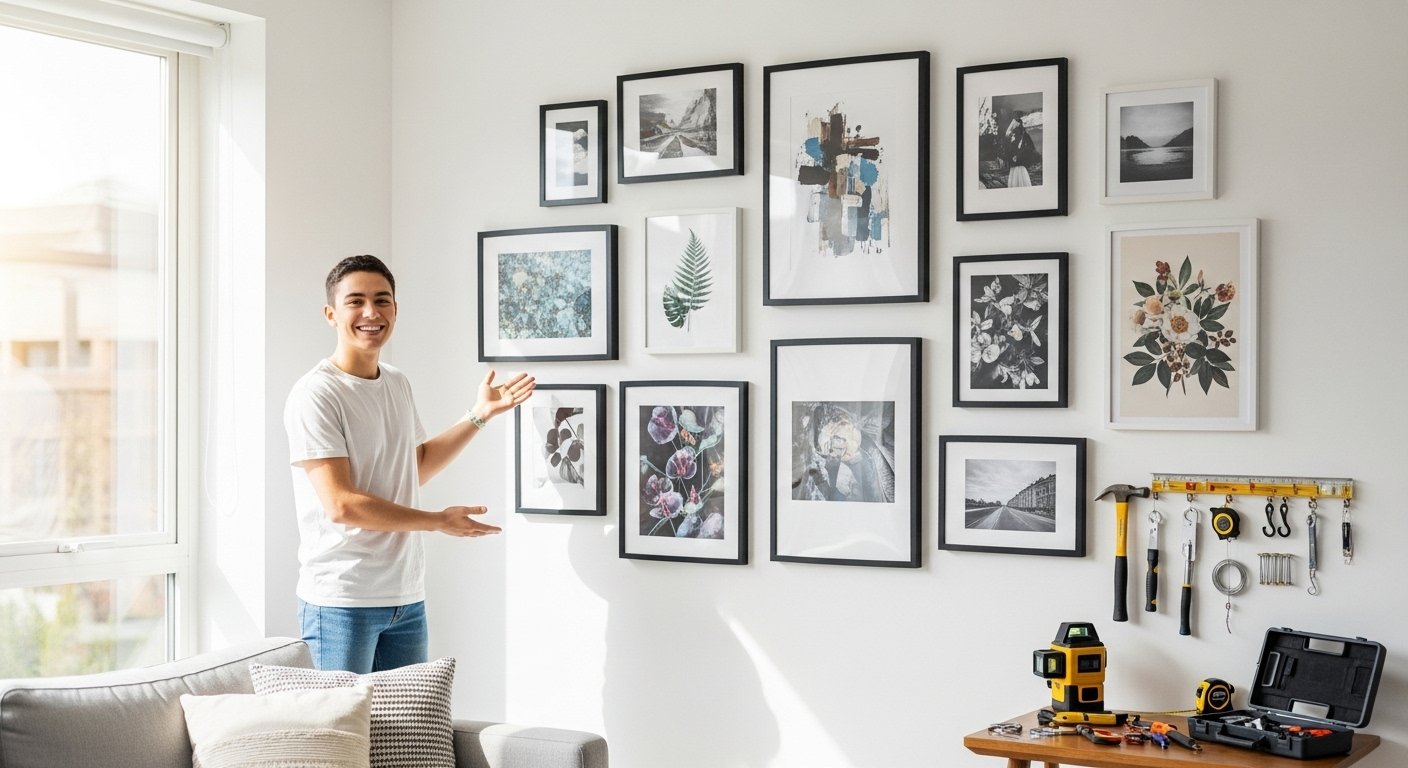
Arranging Multiple Pieces of Art or a Gallery Wall
Creating a captivating gallery wall requires planning. Here’s how to arrange multiple pieces of art or a gallery wall like a pro:
1. Layout on the Floor First: Before touching your walls, arrange your pieces on the floor to visualize the layout. Experiment with different configurations until you find one you love. Consider a symmetrical grid for a formal look or a salon style for a more eclectic feel. [4]
2. Measure and Mark: Use your measuring tape to determine the overall dimensions of your chosen arrangement. Then, using a Laser Level or painter’s tape, mark the perimeter and key hanging points on your wall. This ensures your tools for hanging pictures straight are used to their full potential.
3. Start from the Center: Often, it’s easiest to hang the largest or central piece first, then build out around it. Maintain consistent spacing between frames (usually 2-4 inches) for a cohesive look.
Hanging Heavy Pictures Safely: No Room for Error
For tools to hang heavy pictures, the most critical step is to ensure proper support. Always use a Stud Finder to locate wall studs and anchor directly into them whenever possible. If a stud isn’t available, high-capacity Drywall Anchors like toggle bolts or heavy-duty molly bolts are essential. The French Cleat System is another excellent option for very heavy items, providing robust, distributed support that prevents sagging or falling. Always check the weight capacity of your chosen picture hanging hardware and never exceed it. This directly answers “How do you hang a heavy picture frame?”
Achieving Perfectly Straight Art: The Mark of a Pro
To ensure your art is always straight, utilize your leveling tool for wall art diligently. For single frames, simply rest the level on the top of the frame. For multiple frames, a Laser Level provides a continuous guide. A helpful trick for getting tools for hanging pictures straight is to apply painter’s tape to the back of the frame, mark the hanging points on the tape, then transfer the tape to the wall, leveling it before drilling. This method works wonders for achieving precise placement.
Damage-Free Picture Hanging Tools & Methods: When Nails Aren’t an Option
For renters or those who prefer to keep their walls pristine, how to hang wall art without nails is a common concern. Fortunately, several damage-free picture hanging tools exist:
- Command Strips and Hooks: These adhesive-backed solutions are incredibly popular for their ease of use and clean removal. They come in various sizes and weight capacities, ideal for lighter frames and temporary displays.
- Adhesive Picture Hangers: Similar to Command strips, these offer strong adhesive backing for various weights.
- Plate Hangers: For decorative plates, these cradle the plate and use a single hook, often less intrusive than traditional methods.
While these options are fantastic for avoiding holes, always check their weight limits carefully to prevent disappointment.
The Rise of DIY Home Decor & Why Tools are Key
The landscape of home decor is increasingly shaped by the DIY spirit. With 43% of American homeowners tackling renovations themselves in 2024, the demand for effective home decor mounting tools has never been higher. This trend isn’t just about saving money; it’s about personalization and the satisfaction of creating a space that truly reflects you. As the statistic about 44% of DIYers redoing tasks and 33% using the wrong tool illustrates, having the right picture hanging tools from the start is paramount to success and efficiency. Our guides, like home decor tools: game changers for DIYers and first home decor tool kit, offer more insights into building your essential collection.
Professional Picture Hanging Tools & Secrets: How Do You Hang Pictures and Art Like a Pro?
To truly hang pictures and art like a pro, it boils down to a combination of high-quality professional picture hanging tools and meticulous attention to detail. Professionals often rely on advanced equipment like high-precision Laser Levels for flawless alignment across large spaces. They also understand the nuances of various picture hanging hardware types, from wire systems to D-rings and specialized security hangers for public spaces. The secret isn’t just the tool itself, but the methodical approach to planning, measuring, and executing the installation. They prioritize structural integrity, especially when considering how to hang a heavy picture on drywall, using the strongest anchors or always aiming for studs. Understanding load capacities and employing picture hanging techniques that ensure stability and longevity are hallmarks of professional work.
The average U.S. consumer spends a significant amount on home decor annually, indicating a strong desire for aesthetically pleasing and well-maintained living spaces. By investing in the right picture hanging tools and learning professional techniques, you can ensure that your wall art contributes positively to your home’s ambiance, rather than becoming a source of frustration. From the simplest photo frame to the most elaborate gallery wall, mastering the art of hanging begins with a well-equipped toolkit and a confident approach. Embrace the DIY spirit with the right knowledge, and your walls will thank you.