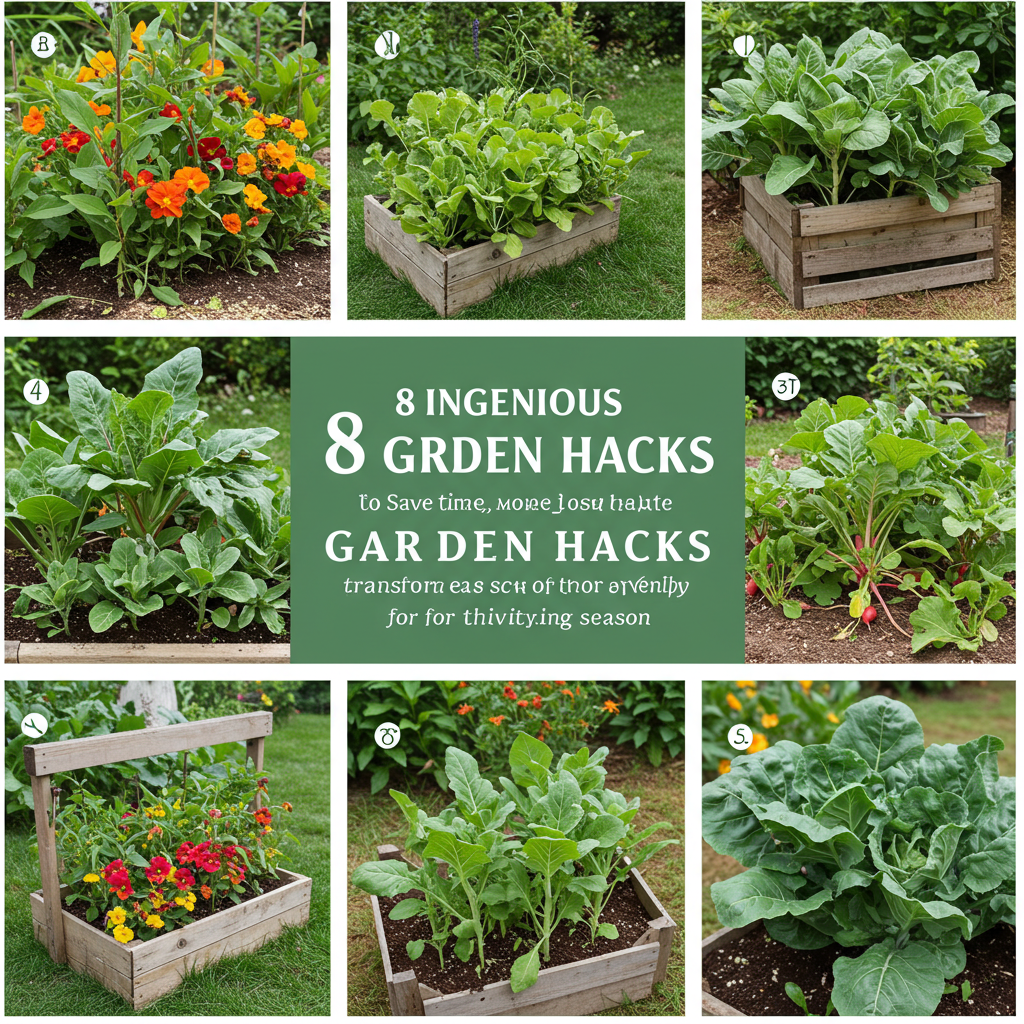
Gardening is a truly rewarding endeavor, connecting us with nature and providing fresh produce or beautiful blooms. Yet, it often comes with its fair share of challenges: limited space, budget constraints, persistent pests, and the ever-present need for efficient watering. But what if you could transform your gardening experience into something simpler, more sustainable, and incredibly effective, all while saving time and money?
This season, unlock your inner gardening genius with 8 ingenious DIY hacks that promise to revolutionize your approach to nurturing your plants. From clever repurposing ideas to natural pest control solutions, these tips are designed to help you cultivate a thriving garden with minimal fuss. Get ready to dig in and discover how a little creativity can go a long way in making your green thumb even greener!
Hack 1: Self-Watering Planters from Recycled Bottles
Watering can be a daily chore, especially during hot summer months. This brilliant hack leverages the power of capillary action to provide a consistent water supply to your plants, significantly reducing your watering frequency and conserving water. It’s perfect for herbs, smaller vegetables, or ornamental plants, especially if you’re prone to forgetting to water or planning a short trip.
How to Create Your Self-Watering Planter:
1. Gather Your Materials: You’ll need two plastic bottles of similar size (e.g., 2-liter soda bottles), a sharp utility knife or scissors, and a piece of cotton rope or old shoelace.
2. Prepare the Bottom Bottle: Cut the first bottle in half, just below the shoulder where it starts to taper. This will become your water reservoir.
3. Prepare the Top Bottle: Take the top half of the second bottle (the part with the cap). Remove the cap. Make a small hole in the center of the cap (if you plan to use it) or directly through the bottle neck if you prefer not to use the cap.
4. Insert the Wick: Thread one end of your cotton rope or shoelace through the hole in the bottle neck (or cap). The rope will act as a wick, drawing water up to the soil.
5. Assemble and Plant: Invert the top half of the bottle and place it into the bottom half, ensuring the wick reaches the bottom of the reservoir. Fill the top section with your potting mix and plant your chosen seeds or seedlings. Fill the bottom reservoir with water.
This setup ensures your plants get a steady supply of moisture, preventing both over-watering and under-watering. It’s an eco-friendly solution that keeps plastic out of landfills and your plants hydrated.
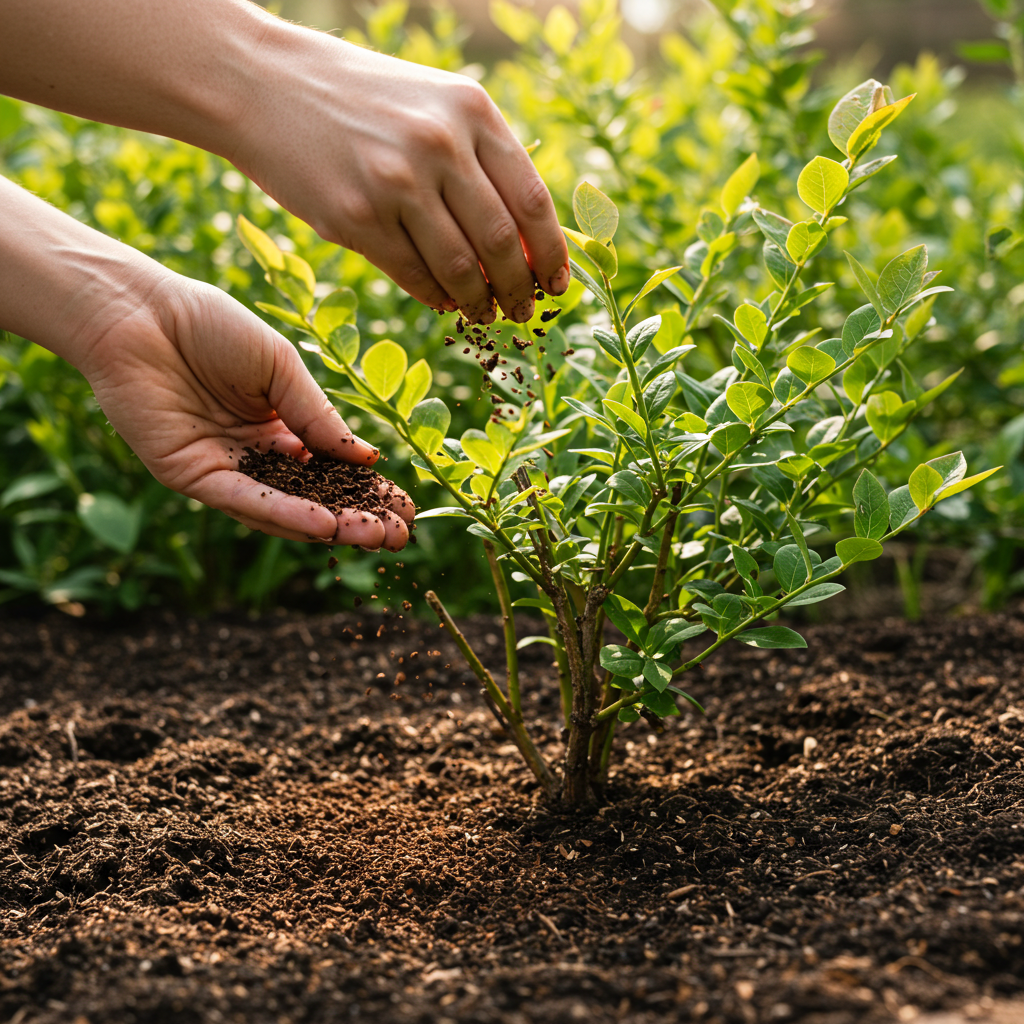
Hack 2: Use Coffee Grounds for Acid-Loving Plants and Pest Repellent
Don’t discard those spent coffee grounds! They are a fantastic, free resource for your garden, offering multiple benefits. Coffee grounds are slightly acidic, rich in nitrogen, and can deter certain pests, making them a gardener’s best friend.
How to Utilize Coffee Grounds:
- Acid-Loving Plants: Sprinkle a thin layer of dried coffee grounds around the base of acid-loving plants such as blueberries, azaleas, rhododendrons, and roses. This will slowly release nitrogen and slightly lower the soil’s pH over time, promoting vibrant growth.
- Soil Amendment: Work coffee grounds into your garden soil or compost pile. They improve soil structure, aeration, and drainage, while also feeding beneficial microorganisms.
- Pest Deterrent: The strong scent and gritty texture of coffee grounds can deter slugs, snails, and even ants. Create a barrier around vulnerable plants, or sprinkle them lightly in affected areas. Just be mindful not to over-apply, as too much can temporarily bind up nutrients.
Remember to use *spent* coffee grounds, as fresh grounds can be too potent and potentially harm plants due to their caffeine content.
Hack 3: DIY Seed Starters from Toilet Paper Rolls
Starting seeds indoors is a great way to get a head start on the growing season, but buying seed starter trays can add up. Repurpose cardboard toilet paper or paper towel rolls into biodegradable seed starters that prevent transplant shock and are completely free!
How to Make Seed Starters:
1. Collect Rolls: Save your empty toilet paper or paper towel rolls (cut paper towel rolls into 3-4 inch segments).
2. Make Cuts: On one end of each roll, make four evenly spaced cuts about 1 inch deep.
3. Fold the Bottom: Fold the cut flaps inward, one over the other, to create a closed bottom, similar to how you would close a cardboard box. This forms the base of your planter.
4. Fill and Plant: Stand the rolls upright in a waterproof tray. Fill each roll with seed-starting mix and plant your seeds according to package directions. Water gently.
5. Transplant with Ease: When your seedlings are ready to be transplanted into the garden, you can plant the entire cardboard roll directly into the soil. The cardboard will naturally break down, minimizing root disturbance and making transplanting stress-free for your young plants.
This method is not only eco-friendly but also incredibly practical, especially for plants that dislike root disturbance, like squash and cucumbers.
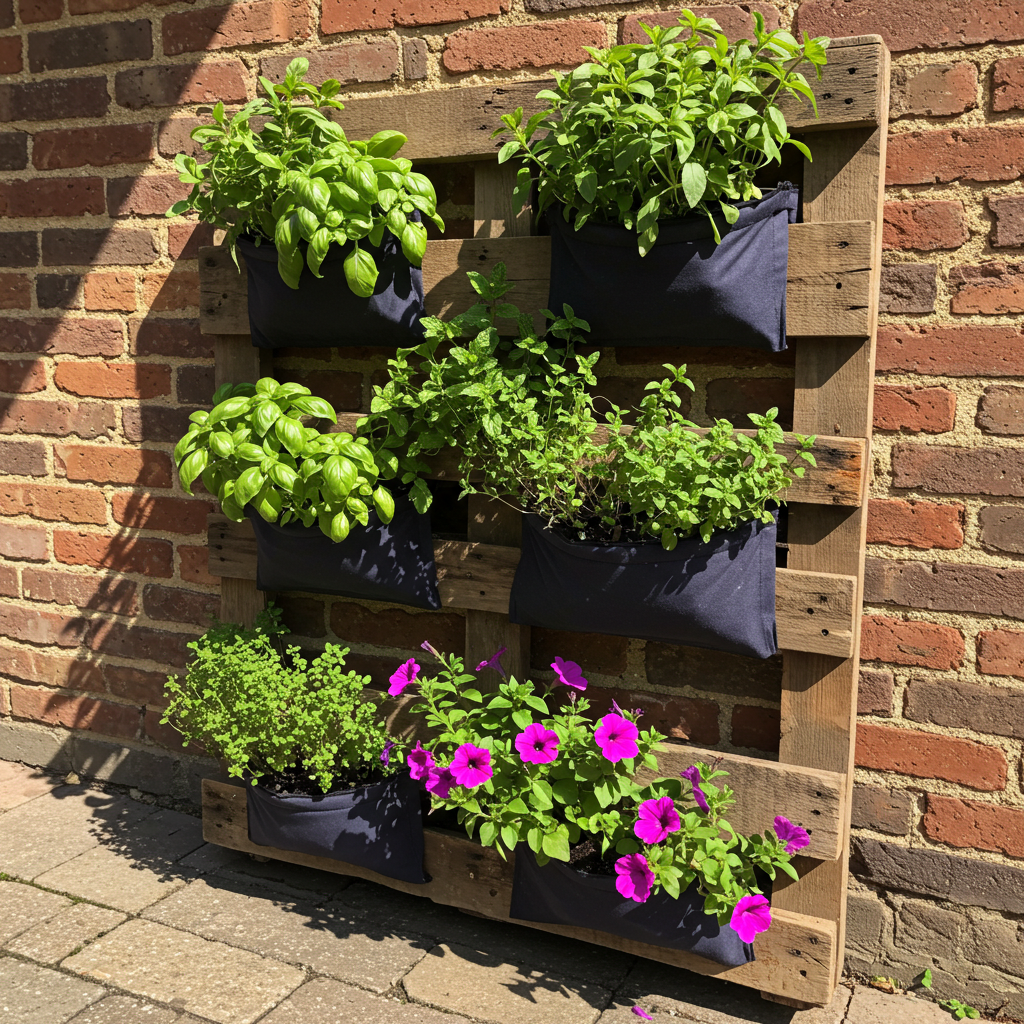
Hack 4: Create a Vertical Garden with Pallets
Limited garden space? Vertical gardening is your answer! Repurposing old shipping pallets into a stunning vertical garden allows you to grow a surprising amount of produce or flowers in a compact footprint. It’s ideal for urban balconies, small patios, or even against a bare wall.
How to Build a Pallet Vertical Garden:
1. Source a Pallet: Look for heat-treated (marked with “HT”) pallets, as chemically treated (marked with “MB” for methyl bromide) ones can leach harmful chemicals. Ensure it’s sturdy and in good condition.
2. Prepare the Pallet: Clean the pallet thoroughly. You might want to sand rough edges and apply a non-toxic sealant for longevity, especially if it will be exposed to the elements.
3. Create Planting Pockets: Using landscape fabric, heavy-duty weed barrier, or even old tarps, staple pieces across the bottom and sides of each
board section to create planting pockets. Ensure the fabric is secure enough to hold soil without sagging too much. For larger pockets, you may need to add a bottom board or use multiple layers of fabric.
4. Fill and Plant: Lean the pallet against a sturdy wall or fence. Fill the fabric pockets with a good quality potting mix. Plant shallow-rooted herbs, leafy greens (like lettuce, spinach), strawberries, or colorful annuals in the pockets.
This hack turns unused vertical space into a productive and beautiful living wall, adding a unique aesthetic to your outdoor area.
Hack 5: Eggshell Boost for Calcium-Loving Plants
Blossom end rot is a common and frustrating problem for many gardeners, particularly affecting tomatoes, peppers, and squash. This condition, characterized by a dark, sunken spot on the bottom of the fruit, is often caused by a calcium deficiency in the plant. Luckily, your discarded eggshells are a fantastic, natural source of calcium!
How to Use Eggshells:
1. Clean and Dry: Rinse eggshells thoroughly and allow them to dry completely. You can even bake them briefly at a low temperature (around 200°F or 90°C) for 10-15 minutes to sterilize them and make them brittle.
2. Crush: Crush the dried eggshells into a fine powder. A blender, food processor, or even a mortar and pestle works well. The finer the powder, the faster the calcium will be available to your plants.
3. Apply: Mix the crushed eggshells into the soil when planting tomatoes, peppers, or other calcium-hungry plants. You can also sprinkle the powder around the base of established plants and gently work it into the topsoil. This slow-release calcium will help prevent blossom end rot and strengthen cell walls.
Beyond calcium, eggshells also contribute trace minerals to the soil and their sharp edges can even deter slugs and snails when scattered around plant bases.
Hack 6: DIY Pest Repellent with Garlic/Chili Spray
Pests are an inevitable part of gardening, but you don’t need harsh chemicals to keep them at bay. A simple, homemade spray using common kitchen ingredients can effectively deter a wide range of garden invaders, from aphids to spider mites, without harming beneficial insects or your edibles.
How to Make Your Natural Pest Spray:
1. Gather Ingredients: You’ll need several cloves of garlic (or 1-2 tablespoons of chili powder/flakes), a few drops of mild liquid dish soap (natural, biodegradable soap is best), and a quart of water.
2. Prepare the Infusion: Mince the garlic cloves (or use chili powder). Combine the minced garlic/chili with the water in a jar. Let it steep for at least 24 hours (or up to 48 hours) to allow the compounds to infuse into the water.
3. Strain: Strain the mixture through a fine-mesh sieve or cheesecloth to remove all solid particles. This prevents clogging your spray bottle.
4. Add Soap: Pour the strained liquid into a spray bottle and add a few drops of liquid dish soap. The soap acts as an emulsifier, helping the spray stick to the plant leaves and smother soft-bodied insects.
5. Apply: Spray your plants, focusing on the undersides of leaves where many pests hide. Apply in the early morning or late evening to avoid scorching leaves in direct sunlight. Reapply after rain or every 5-7 days for persistent infestations.
This organic solution is safe for your family, pets, and the environment, offering an effective alternative to chemical pesticides.
Hack 7: Raised Garden Beds from Cinder Blocks
Raised garden beds offer numerous advantages: better drainage, improved soil quality (as you control the mix), easier access for planting and weeding, and warmer soil temperatures earlier in the spring. While lumber can be expensive, cinder blocks provide an affordable, durable, and relatively easy-to-assemble alternative.
How to Build a Cinder Block Raised Bed:
1. Choose Your Site: Select a level, sunny spot in your garden that receives at least 6-8 hours of direct sunlight per day.
2. Lay the Foundation: Clear the area of weeds and debris. You can lay down a layer of cardboard or newspaper to suppress weeds if desired. Arrange your cinder blocks in the desired shape (rectangle, square, etc.). A single layer is often sufficient, but you can stack them two high for deeper beds.
3. Fill the Holes (Optional): The holes in the cinder blocks can also be filled with soil and planted with herbs, small flowers, or succulents, adding an extra dimension to your garden. Alternatively, they can provide storage for small tools.
4. Fill the Bed: Once your cinder block frame is in place, line the inside with landscape fabric (optional, but helps prevent soil from washing out through cracks) and then fill with a good quality raised bed mix – a blend of topsoil, compost, and other organic matter.
5. Plant: Now your raised bed is ready for planting! The concrete blocks will retain heat, which can be beneficial for many crops.
Cinder blocks are incredibly versatile and can be rearranged or expanded easily if your gardening needs change.
Hack 8: Watering Globes from Wine Bottles
If you’ve ever struggled to keep potted plants consistently watered, especially when you’re away, this hack is a lifesaver. Repurposing empty wine bottles into decorative and functional watering globes provides a slow, steady release of water directly to your plant’s roots.
How to Create Wine Bottle Watering Globes:
1. Collect Bottles: Save your empty wine bottles. Darker bottles might be preferred as they slow algae growth inside.
2. Clean Thoroughly: Wash the bottles well, removing any labels and ensuring there’s no wine residue left.
3. Prepare for Insertion: For best results, you might want to create a small, shallow hole in the soil with a stick or dowel before inserting the bottle, to prevent soil from clogging the bottle neck immediately. You can also cover the neck with a piece of breathable fabric (like old pantyhose) secured with a rubber band, or use a specialized terracotta spike designed for wine bottles if you want to invest a little.
4. Fill and Insert: Fill the clean wine bottle completely with water. Quickly invert the bottle and push the neck firmly into the soil of your potted plant or garden bed. The water will slowly seep out as the soil dries, providing consistent moisture.
5. Monitor: Check the water level periodically and refill as needed. The rate of water release will depend on soil type, plant needs, and environmental conditions.
This attractive solution not only keeps your plants hydrated but also adds a touch of rustic charm to your garden or patio, making it ideal for larger pots and hanging baskets.
Cultivate Success with DIY Ingenuity
Embracing DIY garden hacks is more than just a way to save money; it’s about fostering creativity, promoting sustainability, and developing a deeper understanding of your garden’s needs. These 8 clever solutions demonstrate that often, the most effective tools and techniques are those that are readily available and require a little ingenuity.
From self-watering systems that give you more freedom to natural pest deterrents that protect your harvest, each hack offers a practical pathway to a more manageable and productive garden. This season, challenge yourself to try one or two of these ideas, or perhaps even all of them! You’ll be amazed at the positive impact they can have on your plants, your wallet, and your overall gardening enjoyment.
Happy gardening, and may your season be filled with bountiful harvests and beautiful blooms, all thanks to a little DIY magic!